Tampilkan postingan dengan label Eggs. Tampilkan semua postingan

Minggu, 12 April 2020

Proper Ham & Eggs


Many years ago, when I was still a child, my mother came down with the stomach flu. I could not have been any older than 6 or 7 years old, but it still is very clear in my mind and I know my age because of the house we were living in at the time.


It was left to my father to cook for us, my mother was that ill.  The only thing he knew how to cook was fried eggs.  And so  . . .  we had fried eggs for every meal that day.  Sometime during the night afterwards . . .  you guessed it . . . I got the stomach flu myself.  It was many, many years before I could ever face a fried egg again.  In fact, it has only been in recent years.


One thing Easter always meant in our home was that there would be plenty of eggs to be eaten up.  Mom used to blow some of them out for scrambled eggs for those of us who couldn't abide fried eggs, and then the others would get fried eggs.


Always served with butter fried slabs of salty ham, leftover from the Easter dinner. It was always ham for Easter dinner, never anything else. We would enjoy it cold and sliced along with mashed potatoes, salad and another vegetable. The star of Easter dinner was always the Lemon Meringue Pie we had for dessert.


The star of Easter Monday was always fried ham & eggs. I know in some families that for supper on Easter Day they would have egg eating contests, seeing how many eggs one person could consume.  That was never done in our house.  We had one egg per person, two maximum. 


One nice thick slice of ham/gammon.  Fried in butter until golden brown on both sides.  The fatty edge getting all stick and sweet from the marmalade glaze. OH so good . . .


Sunny side up eggs are always a delight.  It goes without saying that you will want to use the freshest eggs that you have, and they should always be started at room temperature. If they are refrigerator cold, then just pop them into a bowl of warm water for fifteen minutes.  That will soon bring them to room temp.


The only real decision you have to make when frying the eggs is to cook and serve them sunny side up, the whites softly set and the yolks beautifully runny, or to flip them over and serve them over easy . . .  both with a golden brown lacy frill around the edges.


Look at that lovely glazed and golden slice of thick ham . . .  perfect . . .


The yolk of the egg, perfectly runny and ready for dipping  . . .


It doesn't get much better than this.  You can use whatever fat you want to fry the egg in (I always fry my ham in butter), but I prefer a flavourless sunflower oil to fry my egg in.  It doesn't burn, so you can have it well heated when the egg lands in the pan, which gives you that lovely golden brown ruffle.  Butter tends to burn.

Proper Fried Ham & Eggs

Proper Fried Ham & Eggs

Yield: 1
Author:
You just repeat this process for as many servings as you wish. The end result is perfectly fried eggs accompanied with a thick slab of butter fried ham.  Toast fingers for dipping into the runny yolks are a must!

Ingredients:

  • 1 thick slice of roast ham/gammon
  • 1 fresh egg, at room temperature (or two if you can handle that many)
  • 1 small knob of butter
  • 1 TBS of flavourless oil
To serve:
  • Hot buttered toast, cut into fingers, crusts on or off as you please

Instructions:

How to cook Proper Fried Ham & Eggs

  1. You will need two skillets as the ham and the eggs will be cooked separately.
  2. Start the ham first.  Melt the knob of butter in one skillet over medium heat. Once it begins to foam add the slice of ham.  Cook on one side until golden brown,  turn down the heat, then flip over and continue to cook on the other side.
  3. While the ham is browning on the second side, heat the oil in the other skillet.   Crack the egg onto a saucer and slip into the hot oil.  Cover with a lid and leave over low heat, at which time the edges of the egg will be ruffled and golden brown, the whites set and the yolk still runny. If the white is not set, recover and cook for a further 30 seconds. 
  4. Slide onto a heated plate, season with some coarse black pepper and flakes of salt. Add the golden slice of ham and serve immediately with the buttered toast fingers for dipping into that golden yolk.

Did you make this recipe?
Tag @marierayner5530 on instagram and hashtag it #EnglishKitchen
Created using The Recipes Generator


Today I expect I will be making a casserole of some sort with the leftover ham.   What is your favourite thing to do with leftover ham?  I really want to know! 


Read more

Senin, 30 Maret 2020

Anything Hash & Perfectly Poached Eggs


I have become very thrifty over these past weeks. Something I am ashamed to say that I should have been practicing all along.  Nothing is going to waste in my kitchen.  They are saying it could be six months until the present crisis is over and I am keen to make everything we have stretch as far as I can.


Any thing hash is a great way to make good use of just whatever you have in your refrigerator that needs using up and topping it with a poached egg, turns it into a well balanced meal, containing some carbs, plenty of veg and a protein. 


It also makes a great vegetarian meal, for those of you who are not opposed to eating eggs.


The hash is composed of whatever you happen to have in the refrigerator that needs using up.  In my case I had a baked potato left from the other day, which wouldn't have fed two people normally, but when you add a host of other vegetables to it, it becomes like the loaves and fishes and magically multiplies to feed more.


I had a head of broccoli in the refrigerator, some carrots and a swede (rutabaga).  The stems on broccoli are often wasted and thrown away.  They can tend to be a bit fribrous, but if you trim of any fribrous bits there is no reason why you can't eat the rest. You can also eat the leaves of broccoli.


All of my veg was cut into 1/2 inch cubes and tossed together with a small chopped onion and then cooked together in my iron skillet, along with some oil and butter.


I cooked it first over low heat, covered so that the raw vegetables could cook to crispy tender and then I turned up the heat, seasoning it all with some salt and pepper, and cooking it until I had some golden brown carmelised bits.  The perfect hash.


You could of course add a quanitity of chopped cooked meat to this, along with some herbs, but I didn't have any lefover roast or any other meat that needed using and so I decided to top the hash with poached eggs.


You could, of course, do a fried egg, but I figured we would both benefit from the healthier option and so I poached us each an egg.


People can be a bit afraid of poaching eggs, but there is no need to be afraid really.  I have given exact instructions to give perfect results.


It helps if your eggs are at room temperature.  I also like to break them into a small bowl before slipping them individually into simmering water.  Don't ever tip them into boiling water or they will break up all over the place.


Cook them on the heat for exactly one minute, then take them off, cover the pan and let them sit for exactly ten minutes.  You will have perfectly poached eggs.  Ready to scoop out with a slotted spoon onto kitchen paper towelling.


Once drained they are ready to use in any way you want.  In this case, atop a nice plate of crispy anything hash!

Anything Hash & Perfectly Poached Eggs

Anything Hash & Perfectly Poached Eggs

Yield: 2
Author:
A delicious supper for two which makes a good use of what's in the refrigerator

Ingredients:

  • 2 cups of vegetables cut into small cubes (today I used a leftover baked potato, some carrot, some swede(rutabaga), broccoli stems and a small onion)
  • 1/2 TBS butter
  • 1/2 TBS oil
  • salt and black pepper
  • 2 large free range eggs

Instructions:

How to cook Anything Hash & Perfectly Poached Eggs

  1. Prepare your vegetables. Peel the carrots and swede, trim any fibrous bits from the broccoli stems, saving any leaves. Chop them all into a uniform size along with the potato and onion. 
  2. Heat the butter and oil in a heavy based skillet. (I used my cast iron.) Once the butter begins to foam, add the vegetables. Turn them to coat in the fat then turn the heat down low, cover and allow to cook over low heat for about 10 minutes until everything is tender. Remove the lid, turn up the heat, season to taste with salt and black pepper and cook, turning over occasionally until golden brown in places. Keep warm while you poach your eggs. 
  3. Have all your eggs at room temperature and break each into a small bowl before you start. Bring a pot of water, to which you have added 1 tsp of vinegar, to a slow simmer over gentle heat. Once you can see tiny bubbles on the bottom of the pan, carefully add the eggs, one at a time.
  4. Simmer, without covering for exactly 1 minute. Remove the pan from the heat and let the eggs sit in the hot water for exactly ten minutes. (a timer is incredibly useful here) At the end of the time you should have a perfect poached egg, with a beautifully translucent and pefectly set white and a soft and creamy yolk. Remove the eggs with a slotted spoon, one at a time onto some paper kitchen toweling to drain.
  5. Divide the hash and spoon it onto heated serving dishes.  Top each serving with a poached egg and serve immediately.

Did you make this recipe?
Tag @marierayner5530 on instagram and hashtag it #EnglishKitchen
Created using The Recipes Generator


The skys have turned to pewter today and it is threatening of rain.  March is about to go out like a Lion methinks!  Oh well, so much for that old wive's tale as it came in like a Lion as well! 


Read more

Kamis, 26 Maret 2020

Baked Western Sandwich with Oven Hash Browns


One place we always liked eating at back home were the small mom and pop diners! You always knew you were going to get a decent and tasty meal, as well as good value for your money.  My ex would always get a club sandwich with chips, and I would either get a BLT or a Western Sandwich.  Or we would both get a hot turkey sandwich, depending on our mood.  These were our favourites!


I had some sliced ham left in the refrigerator today that needed using up. I really didn't want to waste it, and I go to thinking about how tasty those Western Sandwiches always were.   I had seen photos online of people making huge tray bake Western Sandwiches.  You pour all of the egg filling into a large oven tray and bake it cutting the baked omelet to size when done.

I happen to have a very small oven tray, its only 6 by 8 inches in size.  Perfect for me to make a two person sized oven Baked Western Sandwich!   While I was at it, I thought why not bake some hashbrowns as well. Why not make a meal of it!


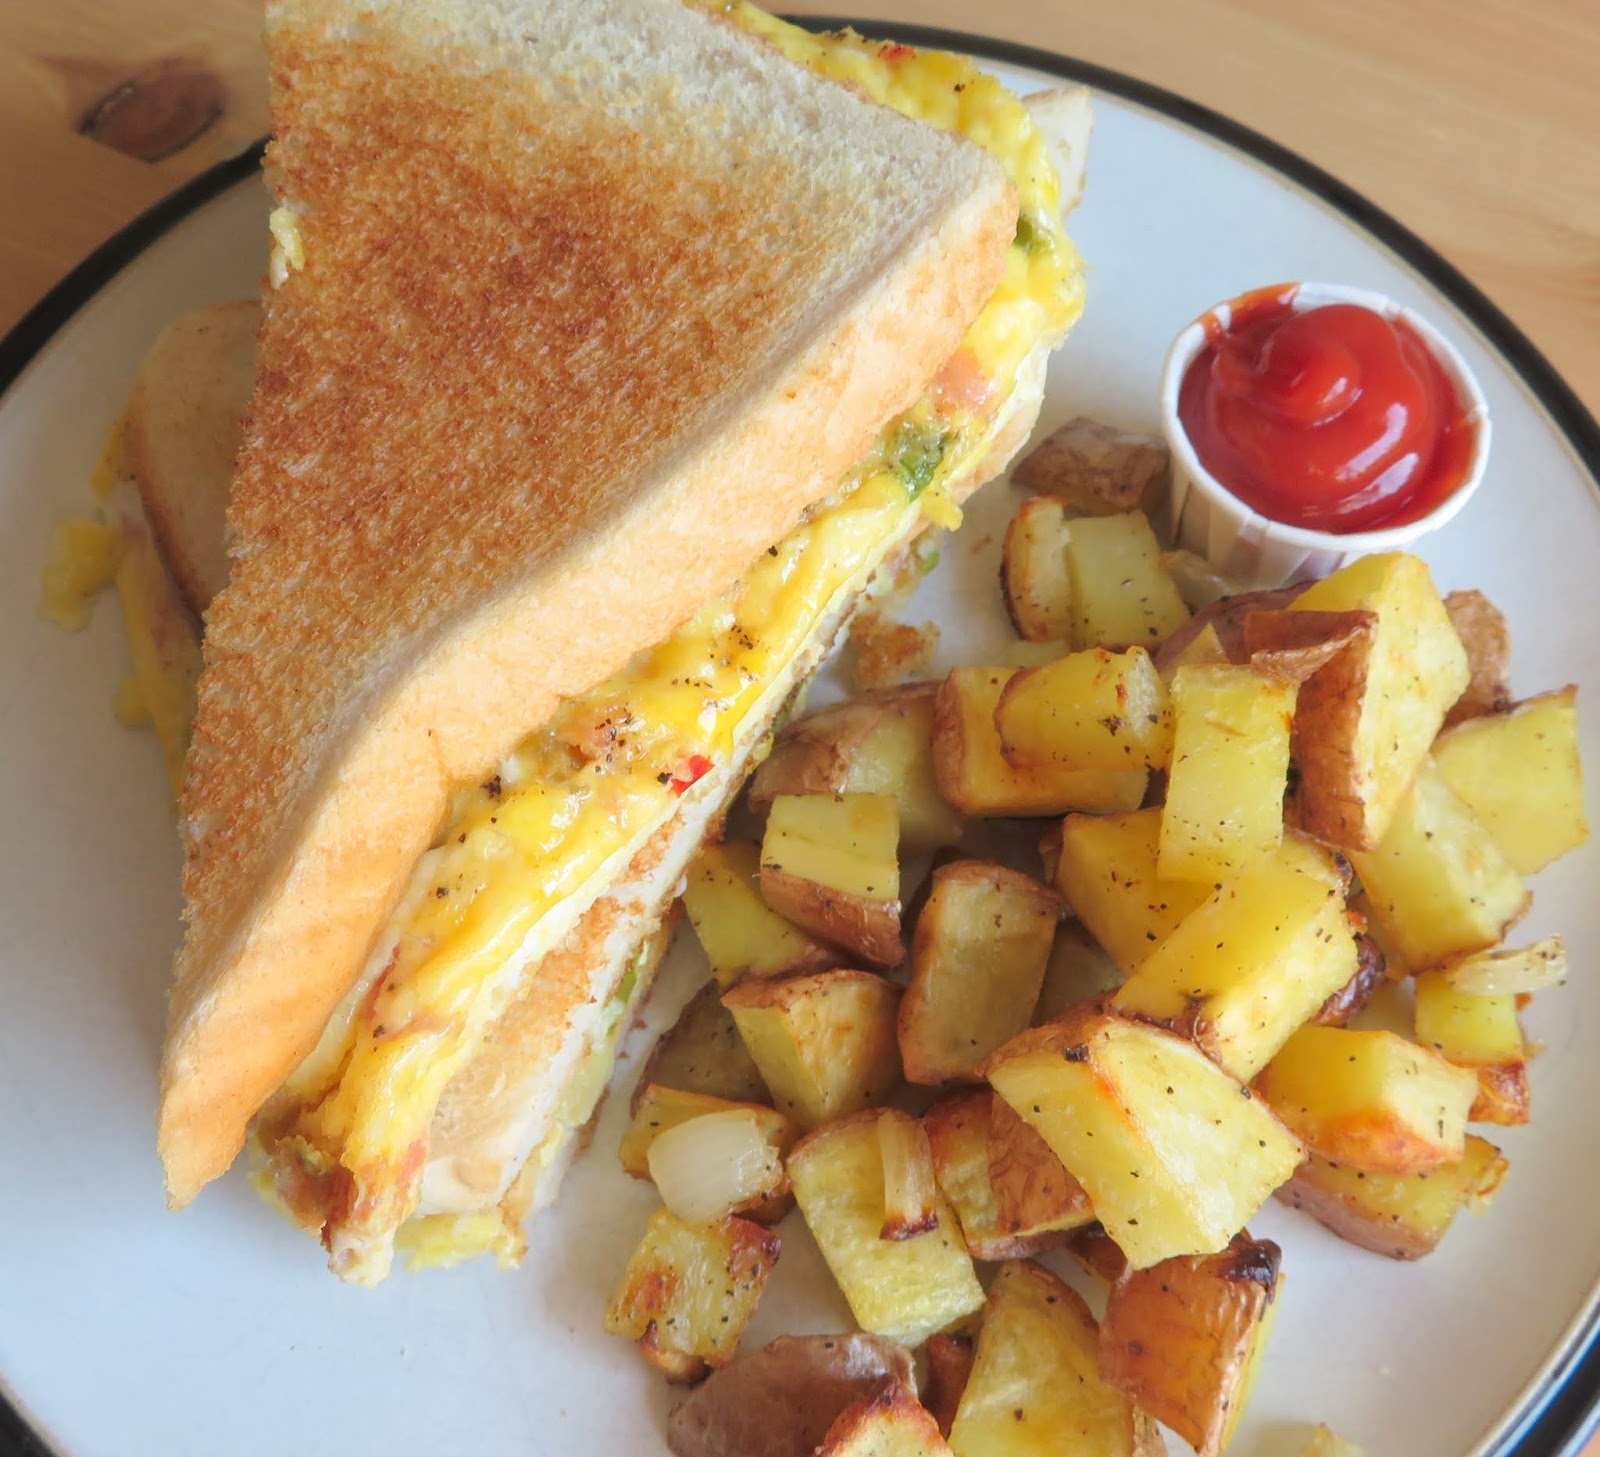
I chopped up some red skinned potatoes and onions, and tossed them together with a bit of oil and seasoning and popped them into a hot oven while I started making the sandwiches.


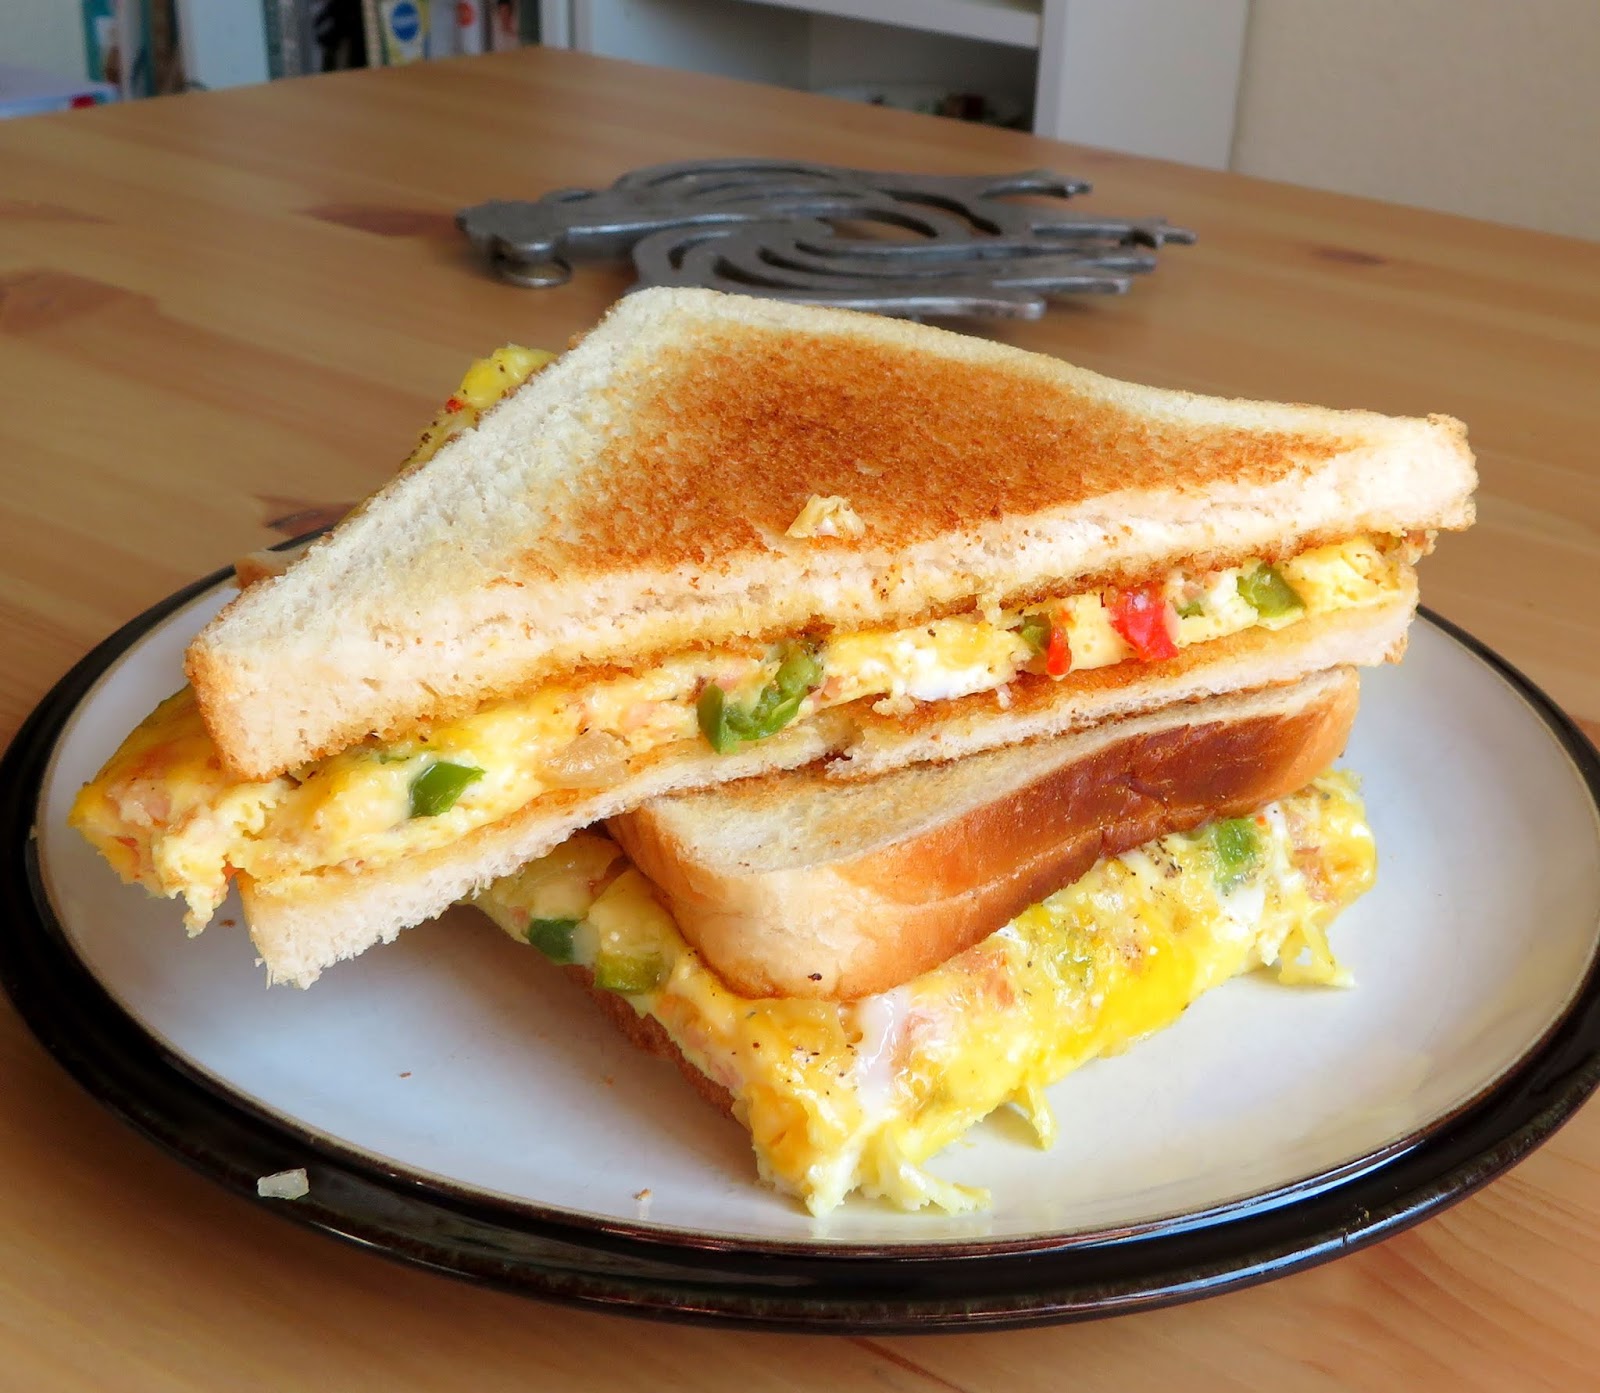
For those of you who don't know, a Western Sandwich is a kind of omelet sandwich, with eggs, cheese, peppers, onions and diced ham, sandwiched between hot slices of buttered toast.  They are a standard Diner sandwich that you might find in North America and very popular.


I did not have any fresh peppers, but I do keep sliced mixed peppers in the freezer.  They come in very handy for things like this. If you have fresh ones so much the better and lucky you!


I cooked these along with some onion and the chopped ham in a bit of butter in a small skillet.  I then spread this mixture out into my buttered teensie baking tray.


I beat the eggs together with some milk and poured them over top, seasoning them with a bit of salt and pepper.


I could have grated cheese over top.  We have a really decent strong aged cheddar we bought at Costco.  Its what you might call artisanal. It has crunchy crystals in it from perfect aging and is nice and crumbly.


I thought to myself . . .  how much nicer would it be if I just crumbled some of the cheese over top and then you would have little pockets of delicious cheese througout.


And so that's what I did with most delicious results.  I took the potatoes out of the oven, gave them a stir, popped them back in, turned the oven temperature down a bit and then popped the eggs in to bake along side the potatoes.


10 to 15 minutes later they were perfectly cooked and ready to pop into the middle of two hot buttered slices of white bread.  The potatoes were lovely and crisp edged and golden brown.  This made the perfect supper for us on a sunny day when I really didn't feel like going to too much trouble.

Baked Western Sandwich with Oven Hash Browns

Baked Western Sandwich with Oven Hash Browns

Yield: 2
Author:
The classic diner sandwich, downsized to feed only two and served with delicious oven bakd hash browns.

Ingredients:

For the hashbrowns:
  • 2 medium potatoes, wash, unpeeled and cut into 1/2 inch cubes
  • 3/4 small onion, chopped coarsely
  • 1/2 TBS oil
  • salt and black pepper to taste
For the sandwiches:
  • 1 TBS butter
  • 1 quarter of an onion, chopped
  • 4 TBS chopped mixed sweet bell peppers (I used frozen)
  • 3 slices of deli ham chopped
  • 3 large free range eggs, beaten
  • 2 TBS milk
  • salt and black pepper to taste
  • 4 TBS crumbled strong cheddar cheese
  • 4 thick slices white bread toasted and butterd.

Instructions:

How to cook Baked Western Sandwich with Oven Hash Browns

  1. Preheat the oven to 220*C/425*F/ gas mark 7.  Line a small baking tray with foil.  Toss the potatoes together in a bowl with the oil, onions and seasoning.  Spread out on the baking sheet. Pop it into the oven.  Roast for about 10 minutes.
  2. While the potatoes are roasting make the filling for the sandwiches.  Melt the butter in a small skillet.  Add the peppers, onions and ham.  Cook and stir until the onions and peppers have softened. 
  3. Have ready a small baking tray or casserole dish.  Mine is about 6 inches by 8 inches in size  Spray it with low fat non-stick baking spray.  Spread the pepper mixure evenly on the bottom of the tray.  Beat the eggs and milk together.  Pour over the pepper mixture in the tray.  Season lighly with salt and pepper.  Sprinkle the crumbled chedder over top.
  4. Remove the potatoes from the oven and give them a stir.  Reduce the oven temperature to 190*C/375*F/ gas mark 5.  Return the potatoes to the oven and place the egg tray in the oven.
  5. Bake for an additional 10 to 15 minutes until the hashbrowns are golden brown and the eggs have set.
  6. Remove from the oven.  Cut the omelet in half crosswise through the centre.  Sandwich each half between two slices of white buttered toast and then cut in half on the diagonal.  Serve hot with the oven hashbrowns .

Did you make this recipe?
Tag @marierayner5530 on instagram and hashtag it #EnglishKitchen
Created using The Recipes Generator


If you are wanting to feed more people just double or triple the ingredients and  bake in a larger lipped baking tray. For four people I would use half a dozen eggs, and a 9 by 13 inch baking tray.  For the potatoes double up on everything and bake on another large baking sheet.   Same temperatures, same time pretty much, although check with the eggs, they might take a tad bit longer. 

 Enjoy!


Read more