Tampilkan postingan dengan label Christmas. Tampilkan semua postingan

Sabtu, 14 Desember 2019

Mint Chocolate Shortbread Fingers


The recipe I am sharing with you today comes from an old Waitrose Cooking Pamphlet from 2009.  I was still working at the Manor when I picked this up at the shops.  I always had it in my mind to bake these and I can't believe it has taken me ten years to do so!


Crisp and buttery these delicious shortbread fingers get their lovely peppermint flavour from the use of crushed strong mint candies. 


You put the  candies into a food processor, or spice grinder and grind them into a powder.  You won't be able to grind them totally into a powder, but if they are mostly powdered with a few tiny bits, that will work fine.


The short bread dough itself is made totally in the food processor. You simply tip the flour and cold butter cut into bits into the bowl of your food processor and blitz.


You want the mixture to resemble fine dry bread crumbs. Once you have that then its time to tip the ground peppermints and a small quantity of sugar into the food processor and blitz again.


Blitz until the mixture comes together into a sort of thick paste.  No worries if you don't have a food processor.  You can do this with an electric whisk. It will just take longer.


The dough then gets pressed into the bottom of a 9X5 inch loaf tin that you have buttered and lined with baking paper.  Make sure you use enough baking paper that you can just use the paper to lift the shortbread out of the pan with after baking.


Over here in the UK, you can get loaf tin paper liners, much like cupcake liners, so I used one of them.  Easy peasy.


They take about half an hour to bake in a slow oven.  Don't be tempted to rush them.  They will be done when they are set, and golden brown.  They shouldn't look greasy. Lift them out while almost immediately and then carefully cut them into fingers (crosswise) while they are still warm.


If you wait until the shortbread is cold, it will be impossible to cut them without them breaking  and crumbling.  If you have waited too long, just rewarm them briefly in the oven, just so that they are warm and slice-able.


They smell all lovely and pepperminty when they are baking.  Very nice and Christmassy!!


Once they have cooled you can get on with the business of glazing them.  More peppermint flavour comes from the chocolate glaze.  You will need a bar of good quality dark mint flavoured chocolate.  I used Lindt.  Break this up into bits and melt it and then spoon and spread it over the top of each finger.


You will also be melting some white chocolate to drizzle decoratively over top of the dark.  They sure do look pretty when they are done!  Christmas and shortbread . . .  well . . .  you can't have one without the other!  It just ain't human!

Mint Chocolate Shortbread Fingers


Mint Chocolate Shortbread Fingers
Yield: About 10
Author:
Crushed peppermints and melted minted dark chocolate give these buttery shortbread fingers a fresh taste that everyone will enjoy. These can be the "after-dinner" shortbreads!

ingredients:

  • 44g tube of Trebor extra strong mints (1.5 ounces of something like Altoids mints)
  • 125g plain flour (1 cup less 2 TBS) (all purpose)
  • 100g unsalted butter, cold and cut into bits (7 TBS)
  • 25g caster sugar (2 TBS)
To glaze:
  • 100g bar Lindt Dart Mint Intense Chocolate chopped (3 1/2 ounces)
  • 50g of good white chocolate, chopped  )1.5 ounces)

instructions:

How to cook Mint Chocolate Shortbread Fingers

  1. Preheat the oven to 165*C/325*C/gas mark 3.  Butter a 9 inch by 5 inch loaf tin and line with baking paper, leaving an overhand to lift it out with.
  2. Crush the peppermints in the bowl of a food processor until it becomes very small pieces, mostly powdered.  Remove and set aside.
  3. Add the flour and the butter to the food processor.  Blitz until it resembles fine bread crumbs.  Tip in the crushed peppermints and the sugar. Blitz until it comes together into a firm paste.  Tip out and press evenly into the bottom of the loaf tin.
  4. Bake in the preheated oven for 30 to 40 minutes, until set and golden brown. Remove from the oven and lift out onto a cutting board using the paper overhang.
  5. Using a sharp knife, carefully cut crosswise into 10 fingers.  Allow to cool completely before proceeding.
  6. Melt both chocolates by your preferred method. (I use the microwave on high at 30 second intervals. It took my microwave about 45 seconds to melt the dark chocolate and 30 to melt the white.)  Spoon and spread the dark chocolate over each shortbread finger, allowing some to drip down the sides.  Drizzle the white chocolate decoratively over top.  Leave in a cool place to set and then store in an airtight container.

Did you make this recipe?
Tag @marierayner5530 on instagram and hashtag it #EnglishKitchen
Created using The Recipes Generator


These are crisp and buttery with a lovely peppermint flavour.  They go down a real treat with a hot cuppa or better yet, a couple of scoops of peppermint ice cream. Yum!! 


Read more

Jumat, 21 Desember 2018

Leona's Peanut Butter Balls


I've told you about my friend Leona many times before.  She has figured large in my life and is one of those lifelong friends that we all love and cherish.  She is the same age as Todd, which makes her about 80, so a fair bit older than myself, but as in love, age is only a number.  We hit it off from the start and still do. 


I have had many women in my life who have influenced me culinarily speaking and Leona was one of them.  She may not know it, but she taught me a lot through the years and shared a lot of really delicious recipes with me that were old family favourites in her family.  (She is from New Brunswick, and I am from Nova Scotia.)  Wee are both maritimers, which is probably a huge part of the reason we gravitated towards each other in the first place. 


There is always a special kinship which is shared amongst Maritimers.  The Maritime provinces have traditionally been some of the poorest provinces in Canada, as well as (in my opinion) being some of the prettiest places. 


The people are humble and friendly and kind.  They are some of the nicest people on the planet, and upon meeting a Maritimer, I would be most surprised if you did not get an invite to supper before your conversation was done! When you go to a Maritimer's home, no matter their situation, you will always be invited into the kitchen and offered a hot drink and a bit of cake or a cookie.  That's just the way we roll! 


My friend Leona shared this lovely Peanut Butter Ball recipe with me many, many years ago and it is something which has been a huge part of my Christmas fixings ever since!


Like fudge or taffy, they figure big in the area of sweets and candies that we Maritimers love, especially at this time of year.  They are almost a cross between a cookie and a candy.  (I have always counted  them as being  more candy than cookie at any rate)  They are simple to make, quick to make and oh-so-delicious! 


Especially if you are a fan of peanut butter!!!  I adore peanut butter.  Smooth peanut butter  is simply creamed together with some icing (Confectioner's) sugar until well combined and smooth.


You then stir in crisp rice cereal and a quantity of toasted nuts.  I like walnuts myself.  And I always toast my nuts when I use them for things like this or in my baking.  It just really helps to enhance the natural flavours of nuts.  This takes about 8 to 10 minutes in a moderate oven.  Just spread them on a baking tray in a single layer.  (Do let them cool before using them.)


Once that's all mixed together, you roll the mixture into 1-inch sized balls, pop them onto a baking tray, and then pop the tray into the refrigerator for about 15 minutes to chill. 


While they are chilling, melt some semi sweet chocolate and butter together.  You then dip/roll the chilled peanut butter balls into the melted chocolate and place back on the baking tray, popping them back into the refrigerator to set them up. (I actually like to store them in the fridge in a covered container once set.)  These are crisp, nutty, creamy and delicious!


Yield: 30

Leona's Peanut Butter Balls

prep time: 15 minscook time: 15 minstotal time: 30 mins
A holiday tradition in my home for the past 40 years! Where I come from you won’t find too many houses without a plate of these on offer at Christmas time! Easy and quick to make, and delicious too!!

ingredients:

1 cup smooth peanut butter (180g)
1 cup icing sugar (130g)
½ cup chopped toasted nuts (I prefer walnuts) (60g)
½ cup rice crispies cereal (11g)
2/3 cup (4 ounces)  semi sweet chocolate (115g)
1 TBS butter

instructions:

Cream
 together the peanut butter and icing sugar. Stir in the nuts and
cereal. Shape into small balls and chill in the refrigerator for 15
minutes.

Melt together the chocolate and butter, mixing until
smooth. Dip the chilled balls into the chocolate and set aside on a
parchment paper lined plate. Set in the fridge to harden. These also
freeze really well so they are an excellent make ahead!!


For the holidays I sprinkle them with a few candy cake sprinkles to dress them up a bit.  Not necessary, but very pretty.  If you can eat just one of these, you are a much better person than I am!  They are incredibly moreish.  They also make great gifts!  Happy Holy-Days! 


Read more

Sabtu, 15 Desember 2018

Cherry Cake Squares


What a miserable horrible lousy rotten day it is out there today.  Windy, rainy, cold . . .  but at least its not snow!  In any case the lighting for my photos is horrible, but I hope you don't mind too much, and that it won't deter you from making one more holiday square for your cookie trays! 


Its an old, old Maritime Recipe from back home.  You will find it printed on the pages of many a community or church cookbook. This is a pretty regular bake for most family celebrations over the holidays.


Its a pretty basic batter . . .  a  Blondie type of bar, but with white sugar instead of brown . . . but it bakes up dense and chewy . . . . 


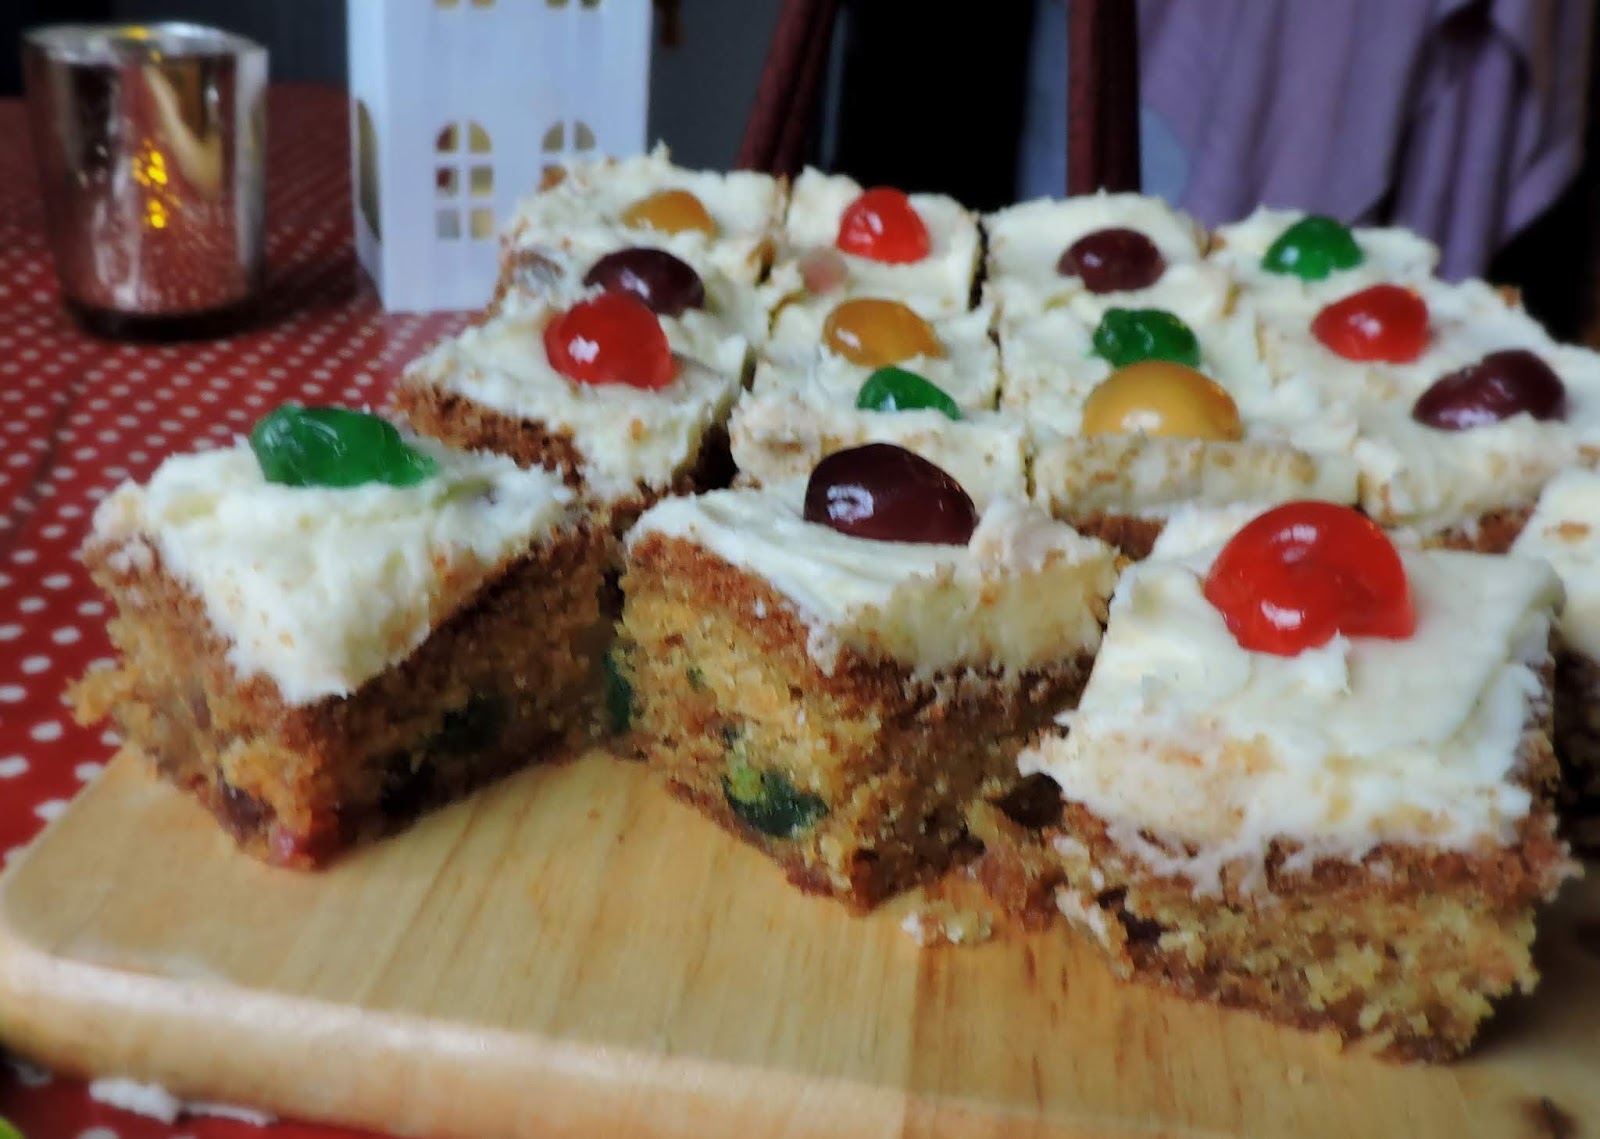
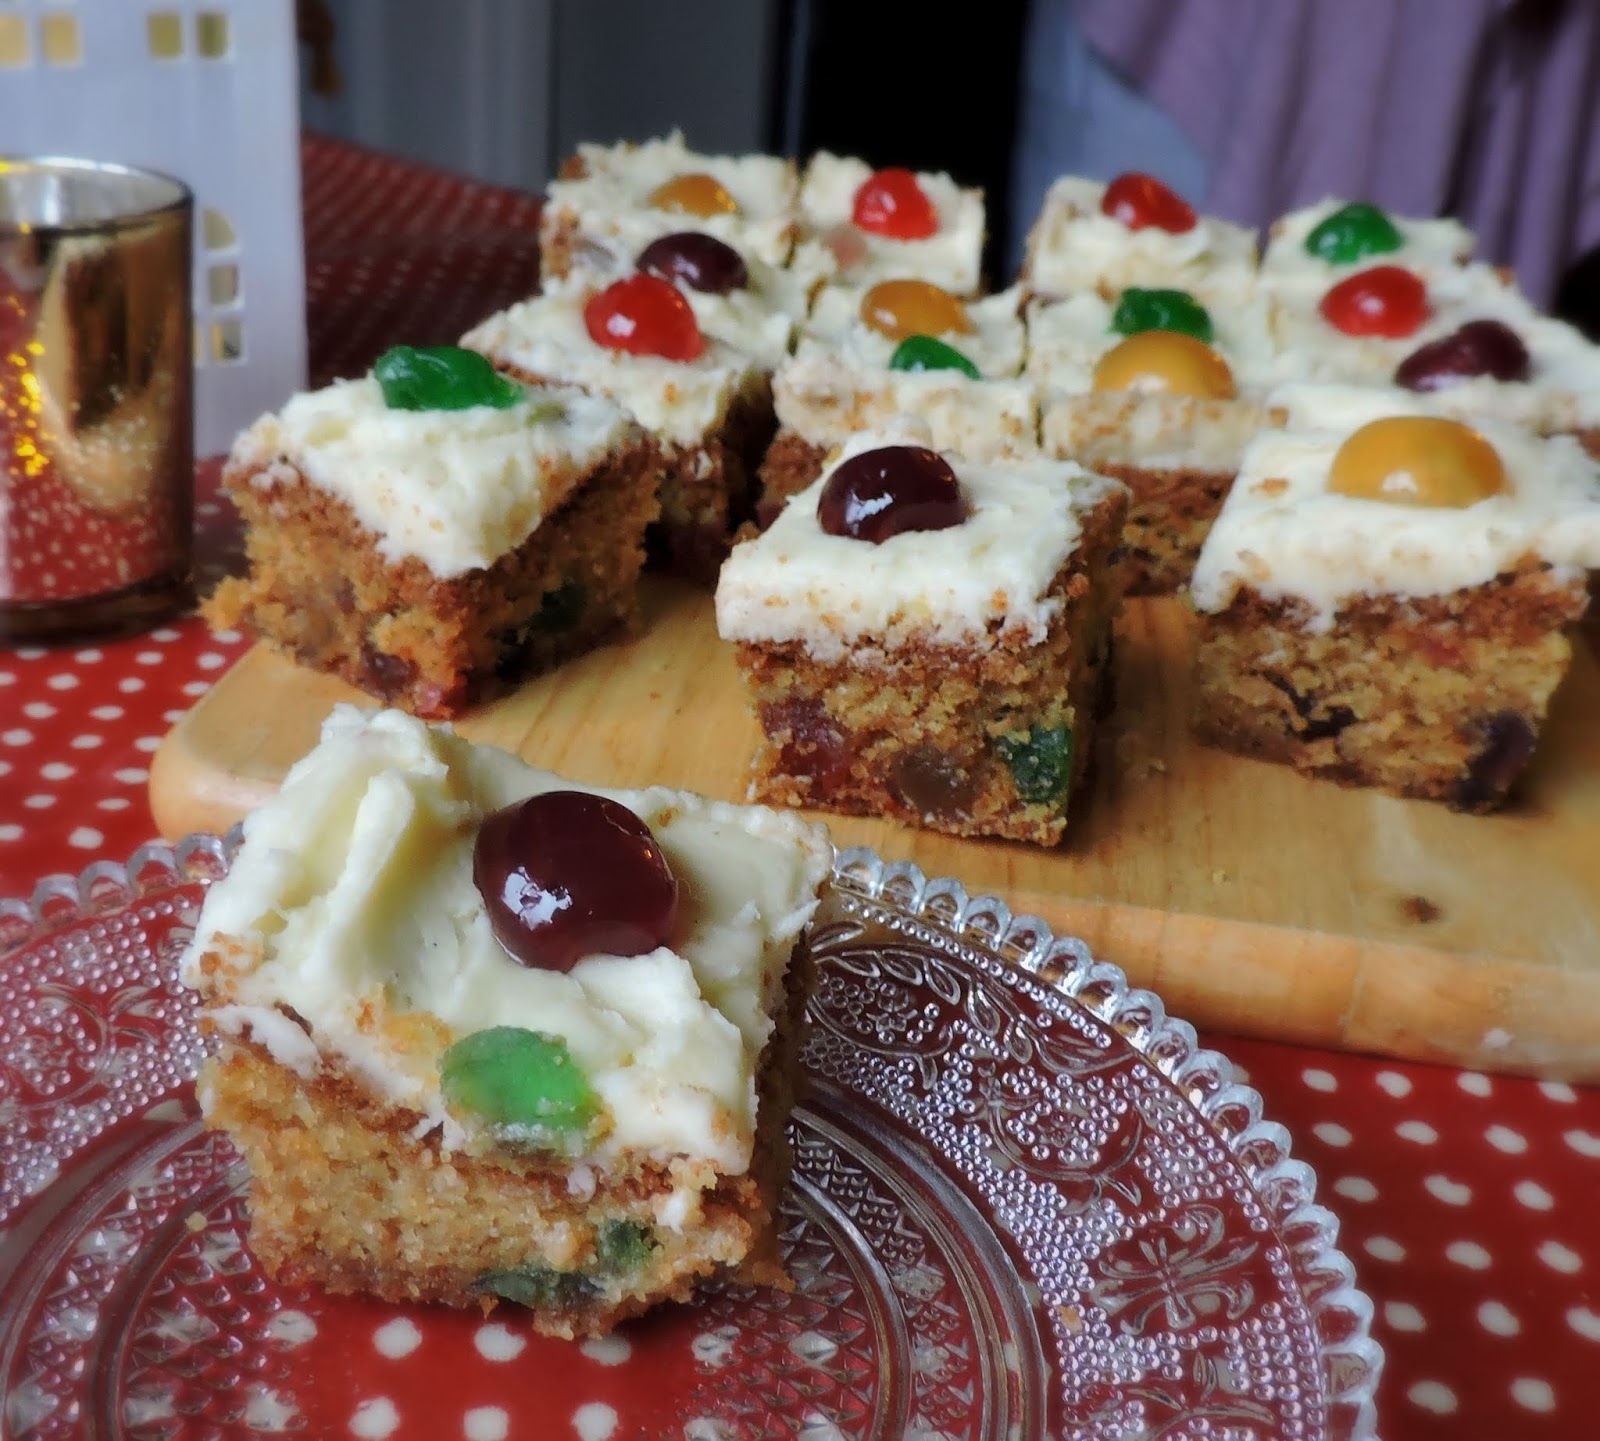
It is filled with lots of glace cherries.  I have used a mix that I was able to get which had golden, dark and light red and green cherries.  Jewel like!  You could use maraschino cherries if you can't get the glace ones.


Whichever cherries you use, rinse them well and dry them so that they don't all sink to the bottom when the squares are baking.


 They are slathered after baking and cooling with a luscious butter cream icing.  Oh boy  . . .  so good. 


These are so rich and sweet, that only a small square will suffice per serving.  I cut them into 1 inch squares.


They do sink in the middle when you take them out of the oven, but don't worry about that.  They are supposed to do that. I just trim off the edges and keep them as cuts to enjoy with hot drinks . . .  the centre part is the bit I ice and save for good. 


These freeze very well.  Even with the icing.  Just ice, decorate and cut, then freeze them in an airtight container.


I put baking paper between the layers to keep them separate and from sticking together. 


They are a really pretty addition to your holiday baking/cookie trays!


Todd had to enjoy one right away with a hot cup of herbal tea. I will have to hide the others, or they will be gone.  I know enough not to eat these myself.  I would be suffering if I did.  Far too sweet for me to be able to enjoy, even the offcuts.


Yield: 25

Cherry Cake Squares

prep time: 15 minscook time: 55 minstotal time: 70 mins
An old Maritime recipe from back home. Wouldn't be Christmas without these dense glace cherry filled Blondie type squares topped with a sweet butter cream icing! These also freeze very well and are a great addition to the Holiday Cookie Tray.

ingredients:


225g butter, softened (1 cup)
300g granulated sugar (1 1/2 cups)
2 large free range eggs, lightly beaten
1 tsp vanilla extract
1 tsp almond extract
1 1/2 tsp baking powder
1/4 tsp each soda and salt
280g plain flour (2 cups)
190g glace cherries, quartered (1 cup)
(rise with warm water and dry)

To ice:
260g sifted icing sugar (2 cups)
115g butter, softened (1/2 cup)
1 tsp vanilla extract
1 - 2 TBS milk
halved glace cherries to decorate

instructions:

Preheat the oven to 180*C/350*F/ gas mark 4.  Line an 8 inch square baking tin with baking paper and set aside.
Cream
 together the butter and sugar until light and fluffy. Beat in the eggs,
 one at at time.  Beat in the vanilla and almond extracts.  Whisk
together the flour, baking powder, soda and salt.  Stir into the creamed
 mixture until well combined.  The dough will be very stiff.  Fold in
the prepared cherries.  Spread into the prepared baking tin in an even
layer.  Bake in the preheated oven for 45 to 55 minutes until golden
brown and a toothpick inserted in the centre comes out clean.  Set on a
wire rack to cool completely, before frosting.

To
 make the icing, beat together the sugar, butter, vanilla and just
enough milk to give you a thick, fluffy, creamy mixture.  Spread evenly
on the cold squares.  Decorate with halved cherries.  Cut into 1 inch
squares to serve.


I wish I could show you how lousy the weather looks from my window near where my desk it.  Its just horrible.  If it was snow, we would be in the middle of a blizzard! Now that would be perfectly charming.  Bon Appetit! 


Read more

Jumat, 14 Desember 2018

Melted Snowman and Rudolf Chocolate Barks


I wanted to make something special for the children of our Ministering brothers (father and son, church thing)  for Christmas.  They are always so good at visiting us.  When Todd 
 had his cancer and was going through treatments, the children came over to us one night and had made him cards and had some cookies they had baked for him along with some cards they had made. 


They are a lovely family.  Their dad was coming over yesterday to pick up our tropical fish which we have re-homed with them and so I thought I would make them some goodies to enjoy over the holidays as well.


I had seen melted snowmen bark all over the internet and so decided to make some for them.  It was really simple to make. You just melt white chocolate and spread it out on a prepped pan . . .  I used Dr Oetker white chocolate for bakers, broken into squares. (Melted in the microwave according to the package directions.)


Add halved mini peanut butter cups for the hats . . .  some googly eyes . . .


Black candy balls for the buttons. (I picked out the dark balls from the Dr Oetker Midnight magic cake decs)


Yellow and orange candy strands (Again I picked them out of a bottle of mixed candy strands from Dr Oetker) for the noses  .  .  .


And broken pretzel sticks for the arms.  In between I scattered white snowflake candies, then popped the tray in the fridge to chill. 


For the Rudolf bark, I used Dr Oetker milk chocolate for bakers, broken up  . . .  which I melted in the microwave and spread out on the prepped pan. (Make sure you don't overheat your chocolate or it will seize. I do it for one minute, then let it sit, stir, and if it needs more then reheat at 10 second intervals. Just what the package says.


For the antlers I used white chocolate coated smallish pretzels.  You can easily cut them in half without breaking them by using a sharp knife and carefully sawing down through the centres.


I put the googly candy eyes on first . . .  and then I placed the antlers above, trying to place them with the cut edges outwards, rounded edges in the middle/bottom . . .  (don't look too closely as I messed up a few by putting them on backwards, lol)


I used red smarties for the noses.  I actually bought  tube of "Rudolf noses" to use for this.  They worked perfectly, but you could use any kind of red candy that you can find so long as it is size appropriate. 


Once again, in between I scattered some candy snowflakes, which really added a lovely festive touch and a bit of contrast with the darkness of the chocolate.


Altogether they turned out really nicely.  I think they did at any rate, and the children's father was oohing over them when he came to pick up the fish.  I really think that the children will love them.  I can't imagine any child not enjoying something like this! 


Yield: 2 different kinds

Chocolate Christmas Bark

Children love this. Its fun to make together.  There are two kinds.  Melting snowman using white chocolate and Rudolf using milk chocolate.  This also makes fabulous gifts!

ingredients:

For the Melting Snowmen:
300g white chocolate, created for bakers (26% cocoa butter) (10 1/2 ounces)
6 mini Reese's peanut butter cups, carefully cut in half
24 candy eyes
Orange or yellow sugar strands
(you will need to pick them out of a container of mixed strands)
36 small dark navy candy ball decs
Pretzel sticks
small candy snowflake decs

For the Rudolf:
300g milk chocolate for bakers ( with 35% cocoa solids) (10 1/2 ounces)
24 candy eyes
12 white chocolate covered pretzels, carefully cut in half through the middle
12 red smarties
small candy snowflake decs

instructions:

Line two separate baking trays with baking paper or
waxed paper or aluminium foil.  I like to make one batch first and then
the other batch after.

Melt the white chocolate
 for the snowmen in the microwave according to the package directions,
in a microwave appropriate bowl.  Pour onto one of the baking sheets and
 spread out to a 1/3 inch thick layer.   Place all of the snowman parts
onto the chocolate spreading them out and building one at a time.  The
half peanut butter cup is the hat, then the candy eyes, a sugar strand
nose, navy candy ball buttons and broken pretzel sticks for the arms.
Repeat until you have used them all up. Scatter snowflakes in between. 
Place in the refrigerator to chill while you make the other one.

Melt
 the milk chocolate for the reindeer in the microwave according to the
package directions, in a microwave appropriate bowl.  Pour onto the
other prepared baking sheet and spread out to a 1/3 inch thick layer. 
Build your Rudolf's as follows and one at a time.  Put the googly eyes
on, followed by a red smarties nose just below.  Place two pretzel halves
 (rounded side in and loop towards the eyes) on top to resemble
antlers.  Repeat until you have used all the ingredients.  Scatter small
 snowflakes in between.  Place in the refrigerator to chill.
Carefully
 break into pieces, using a knife to guide the breaks.  If you are
giving as gifts, leave whole and present on a board wrapped in
cellophane and tied with a ribbon.

Created using The Recipes Generator


If you are keeping this you can break it up.  I find it best to mark lines with a sharp knife first and then break it on the lines.  If you are gifting this, pop it onto a small cutting board, wrap in cellophane and tie up with some coloured ribbons.  Very festive! 


Read more