Tampilkan postingan dengan label Grilling. Tampilkan semua postingan

Senin, 22 April 2019

Grilled Cauliflower & Broccoli Cheese


We have just enjoyed a wonderful Bank Holiday weekend, with beautiful sunny and warm weather!  Its been really gorgeous!  That makes a change, as the norm is rainy, cold and wet on a bank holiday! 


We took advantage of the sunshine to have our first BBQ of the season!  This isn't something we can usually plan well ahead of time.  You have to strike when the iron is hot, so to speak . . .  make hay while the sun shines! 


I had some leftover potatoes from the day before, which I divided between two foil packs. I just sprinkled them with some cheese and let it all melt into them while they heated on on the corner of the BBQ.  


I thought the star of the meal was going to be two thick and meaty bone in pork chops that I had brined, ready for cooking.  We got our chops at Costco and they really are lovely . . .  loin chops with the rib bone attached, each about 1 inch thick.  Simply gorgeous.  For two just use 2 cups of water and 1 TBS each sugar and salt.  Leave them to brine in it for about an hour.  Perfection.  Never a dry pork chop.  Never ever.


I was wrong however  . . .  the star wasn't the pork chops, nor was it the potatoes, both of which were VERY good!  It was the vegetables!


I took one each, broccoli crown and cauliflower head, both of ample size and I cut two "Steaks" from the centre of each.  I guess they were each about 1/3 of an inch thick, and well held together.  I just put the remainder into a plastic bag and returned it to the refrigerator where it is ready to use another time for another purpose, soup or whatnot.

Grilled Cauliflower & Broccoli Cheese

I then brushed both sides of each "Steak" with some olive oil and sprinkled them on both sides with some Italian Herb & Garlic Seasoning. 


I cooked them on a cooler part of the BBQ, turning them every now and then, until they were just crispy tender, and had lovely grill marks on them.
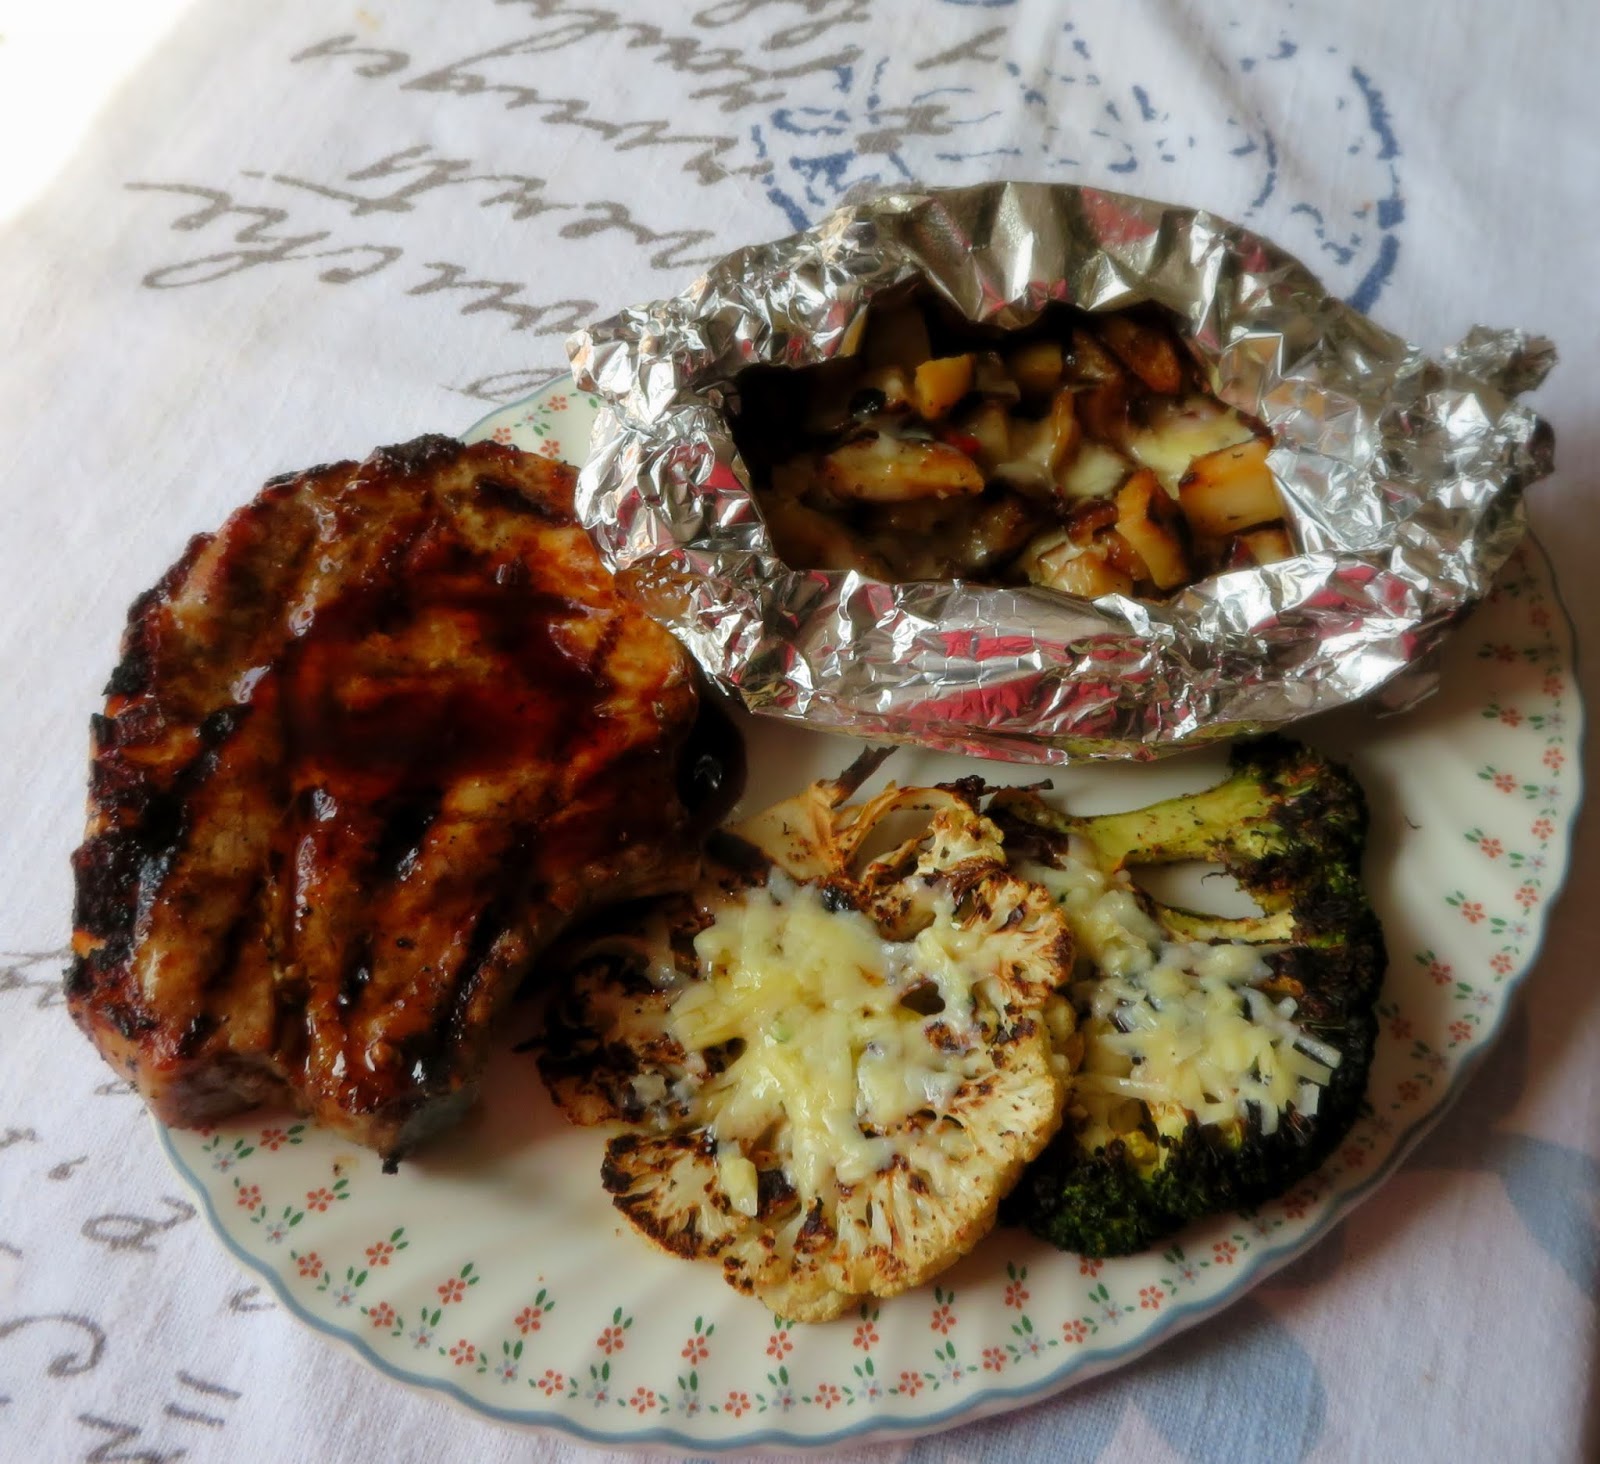

Just before they were done, I sprinkled each with about 1 TBS of grated strong Cheddar cheese, but you could use any kind of cheese you preferred, or even a combination of cheeses. These turned out EXCELLENT.  They were delicious! 


Yield: 2
Author:

Grilled Cauliflower & Broccoli Cheese

I am only giving you the quantities to make two servings, but you can certainly make more as this is more of a technique than an actual recipe!  Its delicious! Don't worry about the end bits of raw veg.  You can break them into florets to cook another day, or serve them raw with a tasty vegetable dip.

ingredients:

  • 1 large broccoli crown
  • 1 large head of cauliflower
  • olive oil to brush
  • Italian Herb & Garlic Seasoning to sprinkle
  • 4 TBS grated strong cheese or as desired

instructions:

How to cook Grilled Cauliflower & Broccoli Cheese

  1. Preheat either a grill pan or the BBQ to a moderately heat.  Taking your vegetable crowns, and working in the middle area, cut two 1/3 inch thick steaks from the centre of each. (Reserve the remaining vegetables for another use, Wrap and place in the refrigerator)  You will have 2 broccoli steaks and 2 cauliflower steaks.  Brush each on both sides with a bit of olive oil and then sprinkle with the Italian Herb & Garlic Seasoning to taste.  Place on the grill and cook until your desired doneness, turning them every so often.  Just before they are done, sprinkle each with 1 TBS of cheese and let it melt. Serve immediately. Delicious!
Created using The Recipes Generator


I know it probably wouldn't be practical to do this for a large number of people because of the amount of veg you would need, not unless you were also offering a raw vegetable tray on the side for dipping. 


Our BBQ Grill is the Space Grill 1800 3-Burner Gas GrillThis stainless steel Space Grill is a revolutionary idea for modern families with a unique fold-away design which is perfect for garden patio grilling or even using on a high rise balcony. It fits in perfectly every where, and is as truly versatile as it is beautiful!  You can either mount it on an existing load bearing wall, or you can buy a specifically designed stand to mount it on.  


We have ours on a stand which was purchased with the grill.  We got this last year and it arrived almost completely assembled.  In fact, it took Todd longer to break down our old BBQ for disposal, than it did for him to assemble the Space grill. Because we don't own our own home, but are in a rental property, we opted to have the separate stand, rather than using a wall mount. Todd found putting the stand together very easy to do.  Once the stand/or wall are ready, mounting the grill on it is a very simple process. 
  
This revolutionary, Australian designed, Chef Grade Stainless Steel grill folds out in about 10 seconds. There is no need for super human strength. Even I have found it quite easy. A simple pivot system changes space into a grill. It is really that easy!  


I can't stress enough how simple it is to install, with the lid doubling as a splash back it is perfect for those small spaces. Simply light the (independently ignited) burners and start cooking. It has two sides,  with a stainless steel  grill and a cast iron griddle plate that  is flat on one side and ridged on the other. What more could anyone ask for?

• Folds away in seconds
• Sleek modern design
• Stainless Steel for rust resistance
• Massive cooking surface (640mm x 480mm)
• Patented auto fold-down drip tray
• 3 separate individual-ignition burners
• Perfect for apartments to mansions
• Lid doubles as a splash-back
• Fast to install
• Multiple cooking plates
• Reversible cast iron flat / grill main plate
• Includes stainless flame grill plate
• No more ugly BBQ's on the deck 


I am hoping that the lovely weekend we have just enjoyed is just the tip of the iceberg and that we will have a whole summer filled with lovely opportunities to enjoy this fabulous piece of kit! 


Read more

Minggu, 01 Juli 2018

Perfectly Grilled Steak & Road Kill Potatoes


I have to say we are really enjoying our new Space Grill. It could not have come at a better time, with all of this lovely dry and sunny warm weather we have been enjoying. Its been a real pleasure to actually have a reliable and easy to use grill so that I can do all of our cooking out of doors, without having to heat up the stove or the whole house in the process! 


The other day I was able to cook our whole dinner on this new Grill, with the exception of the initial boiling of the potatoes for my roadkill potatoes.  I think this Grill is absolutely amazing.  I have never been able to do that before.  Cook my whole meal on the grill.  Its like having an outdoor stove.  It really is very user friendly, and so simple to crack open and cook on.


I was able to cook the steaks which I had been marinating in my killer  marinade for a couple of hours on the grill grate side  . . . 


While on the cast iron grill plate I was grilling thickly sliced onions, my potatoes and fresh asparagus. 


It was all so very easy.  The higher heat seems to be concentrated in the centre of the grilling areas.  I started off heating the grill on high, and then when it came time to cook I reduced the temperature to medium beneath the steaks so that everything was roughly finished in the same time.   


As the potatoes were precooked, they really only needed crisping up on the outsides and preheating.  The asparagus and the onions were raw, but in the time it took to crisp up the potatoes, they were finished.  Once I had the steaks done, I moved them to the outer edges of the grill so they could kind of rest while I was finishing off the vegetables. 


These were Rib Eye steaks,  about 3/4 inch thick, and for medium rare it took an initial searing on one side for 4 - 5 minutes and then 3 - 5 minutes on the other side.  They were perfect for us.  If you like them more well done, cook them for a bit longer, or less done, cook them for a bit shorter times. 


The asparagus took about 14 minutes, with frequent turning, as did the onions and the potatoes.  To prep the onions and asparagus, I simply brushed them with a bit of light olive oil and seasoning them slightly with salt and black pepper.   The onions were lovely and tender and the asparagus was crispy tender.


Asparagus done this way is quite simply beautiful to eat.  I should do it this way all the time! (and I just might!)


The potatoes were a grill take on a potato recipe that I initially shared with my readers many moons ago on my Oak Cottage Blog for Dressed Road Kill Potatoes. (Back in 2011)  And as Road Kill Potatoes long before that on my AOL Journal, so as you can see it is a very, very old recipe.  My friend Pat had cooked them the other day and told me how much she and her family still enjoyed them, even after all these years.  I realised I had never presented them on this blog, and I looked at our new grill and thought to myself, why not give them a go on that!  They worked out beautifully. We were ever so pleased!


*Perfect Steak Marinade*
Makes enough for 4 - 6 servings


A delicious blend of flavours perfect for marinating beef steaks, pork chops and lamb. I poke the meat all over with a fork before marinating so that the flavours really get into the meat. 


2 cloves garlic, peeled and finely minced
2 tsp Dijon mustard
4 TBS Soy sauce
4 TBS Worcestershire Sauce
4 TBS good quality Balsamic vinegar
4 TBS light olive oil
1/2 tsp black pepper 


Whisk all of the ingredients together in a shallow glass dish.  Add your meat, turning it over to coat completely.  Cover and leave in the refrigerator to marinate for at least 2 hours.  Bring to room temperature for half an hour prior to grilling.


These potatoes are ever so tasty.  They are simply boiled potatoes, in the skins, cooled and then smashed down lightly with a flat potato masher . . .  brushed with oil, seasoned and grilled on both sides until crisp and golden.  A bit of cheese is melted on the top at the end and a sprinkle of minced spring onion finishes them off!


*Grilled Road Kill Potatoes*
To serve two, but easily adaptable for more


The regular version of these (done in the oven) is a real favourite of everyone who has them.  I decided to adapt the recipe so that I could do it on our BBQ grill (with excellent results!) You will need a cast iron grill pan for use on the BBQ or a grill plate. 


2 medium potatoes per person
garlic granules, sweet paprika, mixed herbs, sea salt, freshly ground black pepper
olive oil for drizzling
225g of strong grated cheddar cheese (8 ounces)
4 spring onions, chopped fine 


Put the potatoes in a large pot of salted water and bring to the boil.  Cook for 15 to 20 minutes, or until just barely tender when pierced with the tip of a knife.  Drain well and set aside to cool completely.

Drizzle a bit of oil on a baking tray, sprinkle with some of the garlic granules, paprika, mixed herbs, sea salt and black pepper.

Take each cooled potato and smash it down onto the tray (hence the road kill) with a potato masher, without totally obliterating them, but leaving them merely with a flattened, nicely roughed up texture.  Sprinkle more of the spices and herbs over top to taste.  Drizzle them with a bit more oil.  

Heat your BBQ grill/grill plate to high.  Transfer the potatoes to the grill plate with a spatula.  Reduce the heat to medium.  Grill for about 15 minutes, then flip them over and grill for a further 10 minutes or so at which time they should be nicely browned with lovely crunchy bits.  Remove from the grill, scatter cheese over top along with the spring onions.  The heat from the potatoes should melt the cheese. If it doesn't, place a large bowl over top to cover and leave for a few minutes.  Scatter over the spring onions and serve immediately. 


So there you have it.  A complete meal cooked on the grill that is exciting and delicious!  We both loved this very much! 


The Grill/BBQ we are using is the Space Grill 1800 3-Burner Gas GrillThis stainless steel Space Grill is a revolutionary idea for modern families with a unique fold-away design which is perfect for garden patio grilling or even the high rise balcony. It fits in perfectly every where, and is as truly versatile as it is beautiful!  You can either mount it on an existing load bearing wall, or you can buy a specifically designed stand to mount it on.  Either way it is easy to use. Once installed, it folds down and is ready to use in about 10 seconds. (I kid you not!)    After you are finished and it is cooled down and cleaned, you simply fold it back into place, cover it and that is that.  We are ever so pleased with it!  If you would like to know more about it, or perhaps even to purchase one for your own use, do check out the Space Grill Site. 

I wonder what I will cook up on it next???  Watch this space!  


Read more