Tampilkan postingan dengan label jams and preserves. Tampilkan semua postingan

Selasa, 20 Agustus 2019

Apple & Blackberry Jam


I love this time of year when the hedgerows are beginning to fill up with wild blackberries. We grow our own in our garden as well.  This is the perfect time of year to make beautiful jams and baked treas with all of the bounty.  Cooking apples are coming into their own as well.  Combining the two into a fabulously tasty jam just makes sense.


We grow some really lovely cooking apples here in the UK.  They are called Bramley Apples and they are the UK's favourite cooking apple. Large, flattish, green in appearance, sometimes with a bit of a red flush, its flesh is white, juicy and quite acidic which makes them perfect for cooking with.  They turn into a frothy pulp when cooked, which makes them perfect for pies, cakes, applesauce and jams.

They go very well with blackberries, and you will often see them combined in pies and cakes, trifles, and other desserts/puddings here in the UK.  I think nature is so wonderful.  Ofttimes you will find that fruits and vegetables which naturally have a great flavour affinity for being combined with each other happen to ripen at the same time.


I only made half the recipe today as there are only two of us in this house and one of us isn't supposed to eat jam.  I also have to apologise for my lack of jars.  I have found myself in the unfortunate position of not having any empty jars, so a leftover takeaway tray has had to suffice.


I know you will forgive me for such a poor presentation, especially if you make this jam and then taste how delicious it is! 


Oh, I had great plans in my head for how I was going to show this to you, but alas . . . even the best of plans go astray!


Don't let my failing in presentation put you off from making this delicious jam!  It truly is fabulous, and such an easy make.


Just equal quantities of cooking apple and blackberries.  Make sure you pick and clean the blackberries well. If you are using wild ones, soak them for a bit  in salt water to draw any worms.grubs out.  Just fill a large bowl with tepid water and add two heaped TBS of salt. Carefully dump in the berries and then let them sit for about 10 minutes or so.  Swish them around for a bit to draw out any stubborn ones.


The grubs will die and float to the top. You may not find any, but it is worth the extra effort to flush them out.  Discard, drain the berries and then continue with the recipe. You will want to do this about an hour prior to starting your jam. 


Jam sugar is a type of sugar which has had pectin added to it to aid in the quick setting up of jams and the preservation of their colour. I believe in North America it is called Gelling Sugar.  Essentially it is sugar with pectin and citric acid added. 


Without it you would have to boil your fruit for a much longer time in order for it to set properly. It is doable, but using jam sugar shortens the cook time immensely, and ensures a perfect finish.
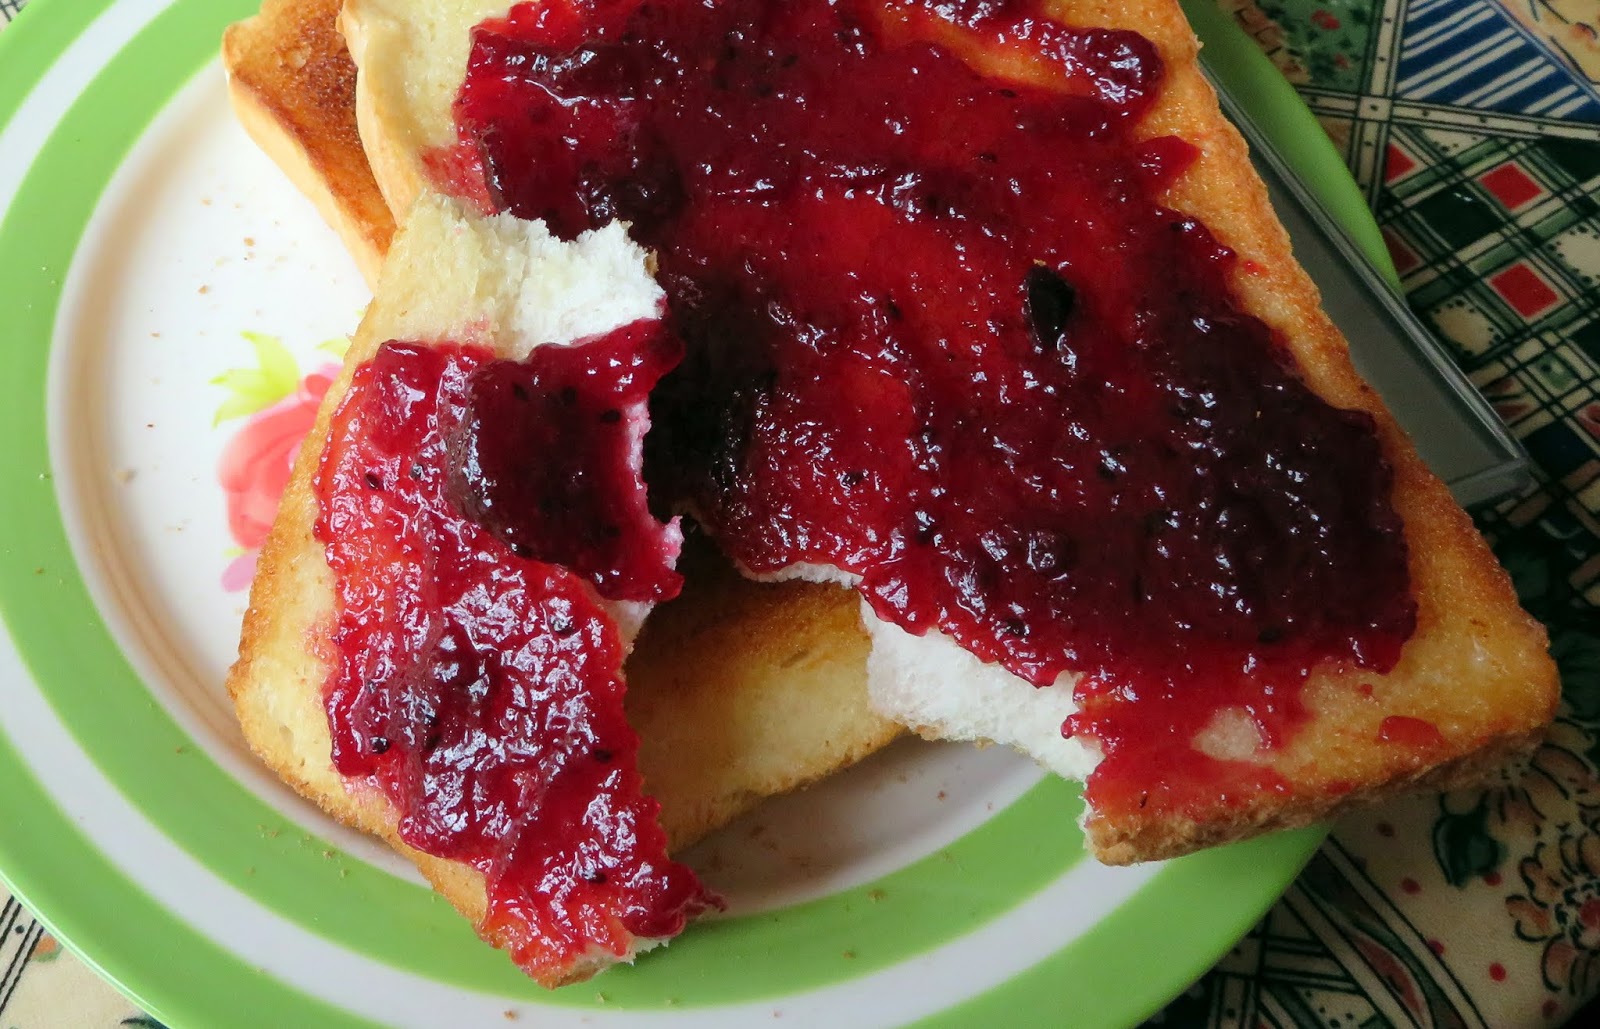

As you can see this is lovely and thick, and Todd says it is really delicious! 


I had huge plans to bake some fresh scones to showcase it as well, but I spent most of today upgrading my phone so you will have to make do with buttered toast . . .


I actually made the jam yesterday  . . .  it is lovely and thick today  . . .


Perfect.  Not too sweet and just a bit tart from the cooking apples  . . .


Toast and jam is one of my favourite things, or at least it used to be before I became a Diabetic. Now it is just a delicious dream, and a once in a blue moon tiny taste.


Apple & Blackberry Jam

Yield: Makes 6 (1 cup/240ml) jars
Author:
This is the best time of the year for making this delicious jam. with local cooking apples ready for the picking and the hedgerows filling up with wild blackberries. Its a lovely time of year.

ingredients:

  • 500g fresh blackberries (a generous pound)
  • 500g cooking apples, peeled, cored and cut into chunks (a generous pound)
  • 100ml water (3 1/2 ounces)
  • the juice of one small lemon
  • 1 KG jam sugar (5 1/4 cups)

instructions:

How to cook Apple & Blackberry Jam

  1. Put the blackberries, apples, water and lemon juice into a large saucepan or preserving kettle over medium heat. Bring to the boil. Reduce to a simmer and cook for 10 minutes, then add the sugar. Bring back to the boil and then boil, stirring for 10 minutes, until the sugar is well dissolved and the jam holds its shape when spooned onto a cold plate. Spoon into clean and sterile jars and seal according to the manufacturers instructions. Store in a cool dark place. Refrigerate once opened.
Created using The Recipes Generator


I've been meaning to ask you.  What do you think of me letting you know on Sundays about my planned recipes for the week?  I thought that if I did that then you could make sure you had in the main ingredients you might need to make them.  Or would you rather it be a big surprise?  It also helps me in the planning of my week as well.  Do tell as I really value your opinion.  This page is as much yours as it is mine!

Up tomorrow:  Hearty Tomato & Bean Soup


Read more

Senin, 18 Februari 2019

Rhubarb, Vanilla & Cardamom Jam, Small Batch


When I had a growing family, I made oodles and scads of jams, preserves, jellies and pickles every year.  I spent hours putting up fruit and veg from our garden for the winter and all of it got eaten. Now that there are only two of us, it just isn't practical anymore as it never gets eaten.  The only kind of preserving I do now, is small batch preserving.  That is what suits the size of our family most of all.


I love rhubarb preserves however and was recently inspired by the influx of early rhubarb in our shops to make a small batch for Todd and myself to enjoy, but with a twist.  This is Rhubarb, Vanilla & Cardamom Jam . . .  this is a delicious trinity of very good taste! 


See how lovely and pink the rhubarb is?  It comes from an area in the UK known as the "Rhubarb Triangle."  This covers a 9 square mile area in West Yorkshire which is famous for producing early season Forced Rhubarb.  


This rhubarb has a Protected Designation of Origin status. (PDO)  Rhubarb which is a native plant species of Siberia actually thrives in the soil and wet and cold winters of this area of the UK.  Forced rhubarb grown in sheds has a beautiful pink colour and is a quite a bit more tender that that which is grown outdoors in the summer months.


I used some to make an upside down cake one day and I had just enough left over to make this lovely jam.   This jam comes from a recipe I adapted from a site called Lovely Greens.


The addition of the vanilla and cardamom are my own additions.  I love the three flavours together. 


The rhubarb is tart, and the addition of lemon juice helps to preserve the pink colour and integrity of the tartness of the fruit. 


The vanilla adds a beautiful aroma and flavour which goes very well with the flavour of the fruit  . . .  I think it actually enhances it.


Cardamom adds an additional flavour.  There is just a small amount  . . .  just enough to give a hint of warmth and additional fragrance . . . it lends a gentle almost citrus-like flavour which goes so very well with the fruit.


 Just a hint which is not over-powering in any way.  You can leave it out altogether if you wish.  I, personally, quite like it.


I had a fresh Parisien loaf from the bakery . . .  I cut it into thin slices and lightly buttered it with some softened Danish butter  . . .


I almost could not wait for the jam to cool down entirely before I was wanting to dig my spoon into it . . .


I know we were going to  be in for a real taste treat!


I was right.  This was pure and utter early Spring bliss . . .

Yield: Makes 2 (340g/12 ounce) jars

Rhubarb, Vanilla & Cardamom Jam

The taste of spring, flavoured lightly with vanilla and ground cardamom. Rhubarb, vanilla and cardamom are a trinity of great taste.  This is another small batch recipe.

ingredients:

  • 500g early rhubarb (1 pound)
  • 475g jam sugar (has pectin in it) (2 1/2 cups)
  • the juice of 1/2 lemon
  • 1 tsp vanilla paste
  • 1/4 tsp ground cardamom

instructions:

  1. Wash the rhubarb and cut it into 1/2 inch pieces.  Place into a reaction free container/saucepan along with the sugar.  Cover and place on the side overnight.
  2. When you are ready to make the jam.  Place on the stove, over medium heat, and bring to the boil. Add the cardamom and lemon juice and continue to boil, stirring, for about 5 minutes. Remove from the heat and let stand for five minutes.  Stir in the Vanilla paste.  Ladle into hot clean and sterile jars.  Seal tightly while still hot.  Once cooled, if the lids have popped down you can store in a dry dark place. Otherwise store in the refrigerator.  Delicious.
  3. Note - Jam sugar is granulated sugar which has the pectin already added.
Created using The Recipes Generator


What a wonderfully European combination  . . .  soft chewy bread from France . . .  pink rhubarb from England . . .  and creamy lightly salted butter from Denmark.  How very cosmopolitan!  Bon Appetit! 


Read more

Rabu, 11 Juli 2018

Crystallised Rose Buds


Today I did something that I have been wanting to do for a very long time, but had never quite managed to get done for one reason or another.  I made Crystallised Rose Buds.  The time was right. Our wild rose bush was covered with blooms and tons of cute little pink rose buds.  I had nothing else to do, and so I just went for it.  I was thrilled with the results!


These are actually a lot easier to make than one would suppose and use only three ingredients, four if you count patience.  Rosebuds. Sugar.  Water.  That's it! Simple!


You want to pick really tiny rose buds.  You want them to still be pretty tightly closed . . . these ones work the best. Loose petals would fall off when you are crystallising them, which isn't exactly what we are looking for here. We want buds. 


We don't use any pesticides on our flowers, so they are pure and organic.  It is really important to use pesticide free rosebuds.  You will want to wash them in cool water and then just shake them out gently in a colander.  This will get rid of any insects that you might have inadvertently brought in with your flowers.  

Gently, gently keeps them from bruising. We don't want that. Then you clip off the stems with a pair of kitchen scissors.  I clip them off right below that little ball at the base of the bud, just so you know.


You make a simple sugar syrup by dissolving ordinary granulated sugar in hot water over moderate heat and then just throw in the rosebuds. 

  
Cook, stirring gently and constantly until the sugar syrup comes to the soft ball stage, at which a small amount of it will form a soft ball when dropped into cold water. That is a ball that is soft and malleable, not hard or brittle.  I use a candy thermometer myself, which gives me a precise result. The temperature you are looking for is in the recipe below. 


Once that happens, you just take them off the heat and keep stirring gently.  Eventually, and it really doesn't take too long, you will see the sugar starting to crystallise and clump. It gets rather opaque as well.  That's when you know the hard work is done.  Just pop them into a wire sieve and gently shake them over a piece of newspaper or summat you can just throw away.  This helps to get rid of any excess sugar. You might find some have clumped together and now is your chance  to gently break them apart.  Let them air dry after that and then store in a cool dark place in a glass jar with a lid!  Voila!! You have some beautiful Crystallised Rose Buds. 


*Crystallised Rosebuds*
Makes about 3 1/2 cups 
You can vary this recipe according to the number of rosebuds you have.  Just make sure you pick the tiniest ones you can find, and that they are pesticide free.  

600g tiny rose buds (4 cups)
380g granulated sugar (2 cups)
240ml hot water (1 cup) 


Pick your rosebuds. Wash them carefully, being as gentle as you can. 


De-stem them (I cut them off just beneath the bulb) and then carefully shake them dry. 


Place the sugar in a saucepan over medium heat along with the hot water.  Heat until the sugar dissolves.  Add the rosebuds. 


Cook over medium heat, stirring gently constantly, until the sugar syrup reaches the soft-ball stage. (118*C/235*F) (The sugar syrup should form a soft ball if a small amount is dropped into cold water.)   


  Remove from the heat and continue to stir gently, stirring until the syrup resembles the texture of coarse meal. 


Put into a wire mesh colander and gently shake off any excess sugar.  


Cool completely and then put the rosebuds into a jar and seal.


Store in a cool, dry and dark place


You might think these would smell really rose-like, but they don't.  They just smell like a garden . . .  green and foresty.  I can't wait to use them as a decoration for cakes or cupcakes. Ohh, they would be lovely on sugar cubes, and then when your guests put one into their tea, the sugar would all melt off and they would be surprised with one perfect rosebud in their cup! Magic! Bon Appetit!


PS - Have you checked out the cost of buying crystallised flowers?  I did and they are astronomical!  The ones I made literally cost me pennies and there are no preservatives at all.


Read more