Tampilkan postingan dengan label Cooking Techniques. Tampilkan semua postingan

Selasa, 19 November 2019

Salt Block Cooking

 Steak and Eggs  

What you are looking at is a plate of Steak and Eggs.  There is nothing so unusual to that you might be thinking, but  . . .  what if I told you I had cooked it on a block of Himalayan Sea Salt?  Is your interest yet piqued?   

Himalayan salt blocks – also known as Himalayan salt plates, gourmet salt blocks or pierre de sel – are an exciting way of seasoning and serving food. The dusky pink Himalayan rock can be slowly heated or chilled to extreme temperatures. The tight crystal lattice in the Himalayan salt block means that it holds its temperature for long periods of time – to the extent that the salt block can be used to fry fish, or keep ice cream chilled.


They come in a whole variety of sizes, from small individually sized ones, to larger ones. You can use them for all sorts and they really make for a unique presentation of raw or cold foods, imparting a tiny bit of flavour to the foods as they sit upon its surface. 

Above is an example of one being used with chacuterie tray.


They also make for unique, simple and attractive hors d'ouvres trays.  This one has basil leaves topped with some buffalo mozzarella, ripe tomatoes, a drizzle of balsamic and some basil pesto. 


Most excitingly, the Himalayan salt block is rich in mineral salt, which flavours – or even cures – the food served on the salt plate.


They are wonderful to cook on. You can do this outdoors on the BBQ, or in the oven, or over the gas elements if you have a gas stove.  This is where they really shine. They are not difficult to use at all, and impart a complex and amazingly unique and slightly salty flavour to what you are cooking on them.


You can cook anything from eggs to steaks, to fish, vegetables, etc. on them. I can't think of anything that you couldn't cook on them, except for maybe soup, and the reason for that should be patently obvious.


I got my Salt Plate from a company called Sous Chef, which is a company that experts at providing unique and quality gifts for cooks, professional and otherwise. You can find a wide range of ingredients, equipment, tools, etc. on their site.  If I was buying a gift for a foodie, that is where I would check first.  They often stock items that you have a difficult time finding or can't find anywhere else.  I love them. 

The company was founded in 2012 by a woman named Nicola Lando who was frustrated with the lack of range and quality of ingredients to be found in the shops.  Sous Chef now offers over 4,000 carefully selected products from around the world.  If you are looking for a foodie type of a gift for Christmas, this is the place to start.  

My pink plate Terre Exotique was carved deep n the heart of the Himalaya in the Pakistani region of  Kasmir.


This thing is damn heavy, so be forewarned.  If you drop this baby on your toes, chances are your toes are going to be broken!  Take care! 


HOW TO TEMPER YOUR SALT BLOCK PRIOR TO COOKING

Salt blocks can be heated or cooled to extremely hot and cold temperatures which makes them extremely versatile. Being a natural product with imperfections and lines, it is important to do this slowly. Heating a salt block too quickly can cause it to crack or otherwise break.  If you treat it with care however it can last for a really long time.

Its extremely important to heat a salt block carefully, especially when using it for the first few times. This will help to ensure the strength of the salt block over the long term and will help to improve its performance as a cooking surface.  This process is called tempering.  Its really not all that difficult to do.

  • Place block in the oven on a low rack 
  • Turn oven on to lowest setting (76*C/ 170*F) 
  • Leave it for 30 minutes at this temperature Increase temperature by 50 degrees and leave another 30 minutes 
  • Repeat this process, raising 50 degrees every 30 minutes, until it reaches a temperature over 260*C/500*F
  • Turn the oven off and leave the salt block there, with the door closed, until it completely cools to room temperature 

Don't worry if it makes some crazy crackling noises and develops a few visible lines when you are tempering it.  This is quite normal.


When you go to cook on it for the first time you will want to begin by heating it slowly. It is important to do this with care in order to prolong the life of your salt plate. Its a bit more complicated than using an ordinary skillet, and does take a bit more time, but it is well worth the extra care given in the long run. Once you get use to doing it, it won't seem as complicated and you can build the time it takes into your cookery schedule and timings.


HOW TO HEAT YOUR BLOCK ON A STOVE TOP 

  • Make sure it is completely clean and dry and that it has been at least 24 hours since it was wet. 
  • Place the salt block over a gas burner (or over an electric range, but place a metal ring or grate of some kind in between to allow air to flow between). 
  • Turn the heat on low and set a timer for 15-20 minutes (depending on size- larger blocks take longer). Increase the heat to medium and leave for another 15-20 minutes. 
  • Turn up again to medium/high for another 10-15 minutes. 
  • If you have one, use a laser thermometer to make sure the block is around 500 degrees. Don’t have one? Splatter a few drops of water on the salt and make sure they dance and evaporate immediately. Be careful not to touch it. Once heated salt blocks really maintain the heat for a long time.
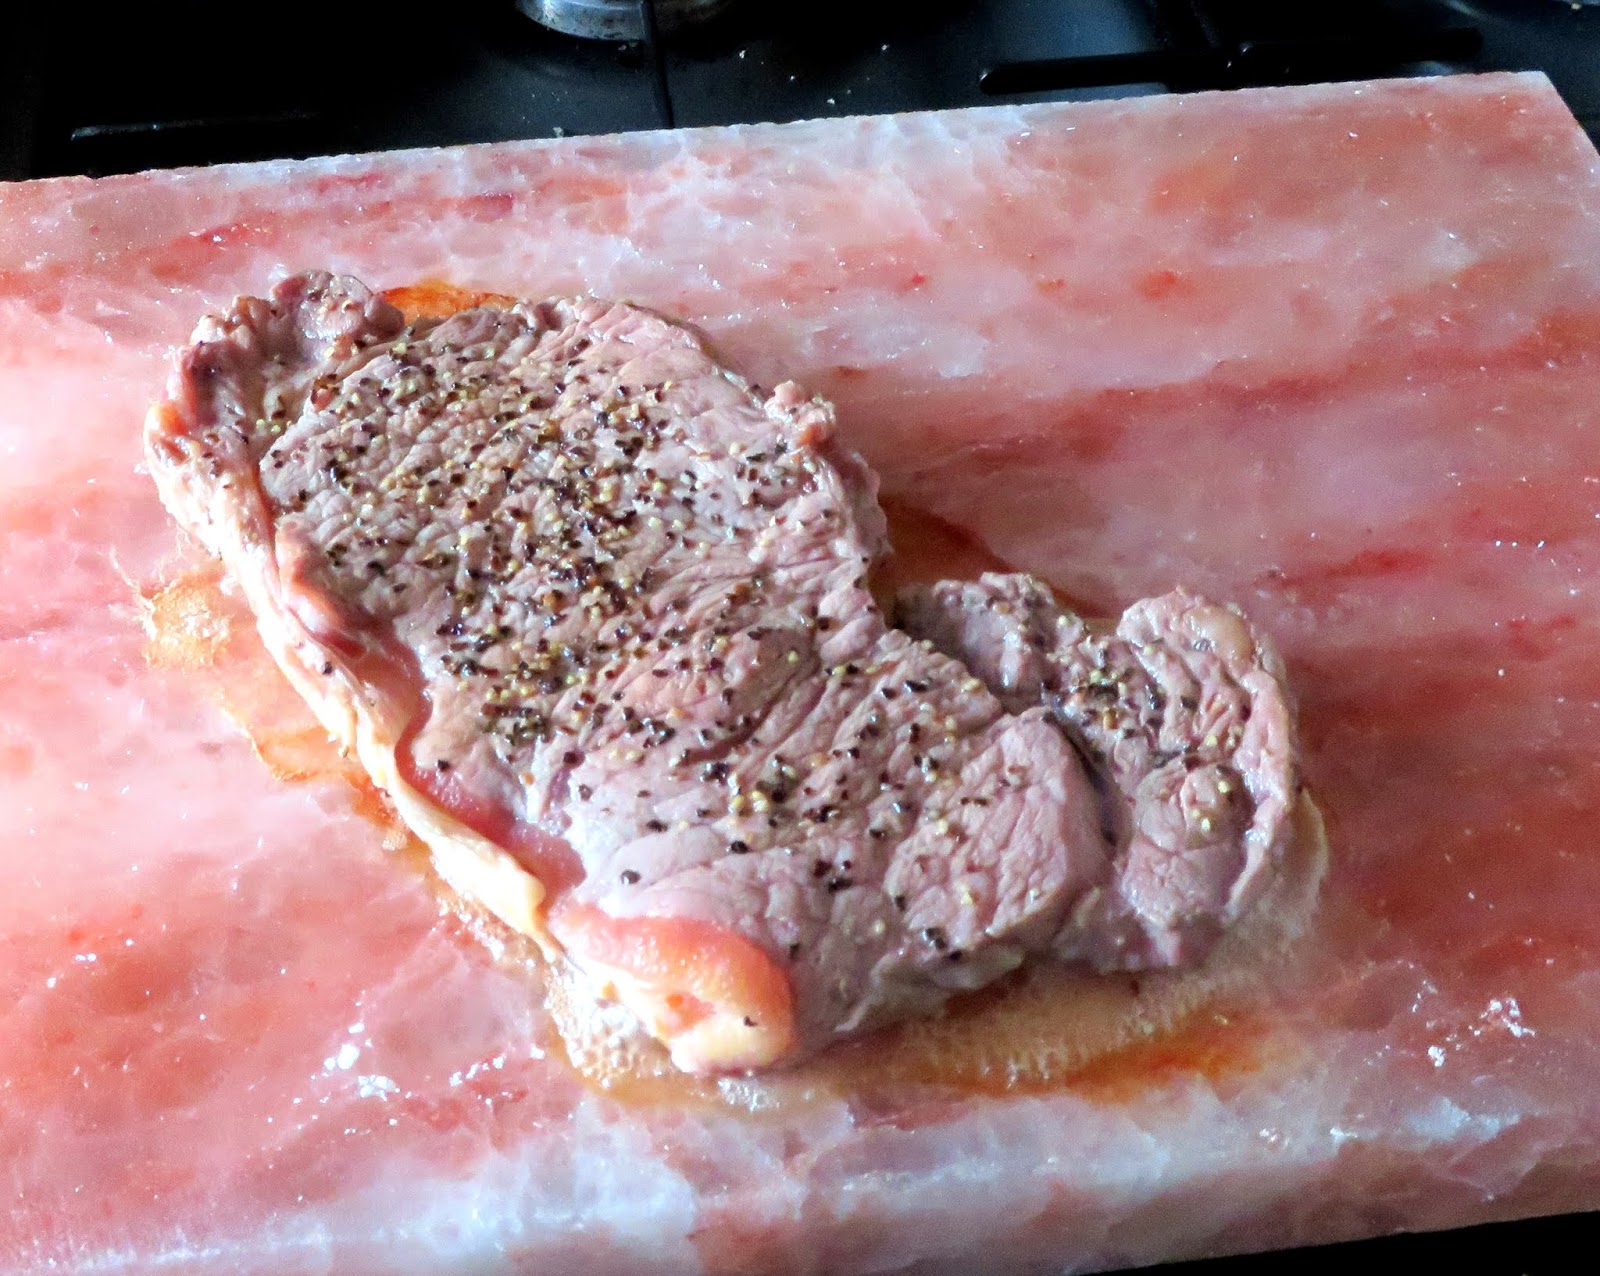
  At this point it is ready to use.


HOW TO HEAT YOUR SALT BLOCK ON AN OUTDOOR GRILL  

  • Salt blocks can be used on gas and charcoal grills. 
  • On gas grills, start with low heat just as you would on a gas stove and work up slowly. 
  • With a charcoal grill, put all the charcoal on one side and the salt block on the other. 
  • Watch the temperature carefully to ensure it doesn’t heat up too fast. 

It is the thickness and strength of a salt blocks  which make them such an amazing surface to cook on. Once heated, they will hold their temperature for quite a while without a heat source. When you use it on a grill, it also adds a delicious smoky and mild lightly salty flavor to what you are cooking on it.


Once your salt block is pre-heated you are ready to cook on it. The bonus of the length of time that it takes to preheat it means that you have extra time to get all of your ingredients prepped and ready to cook. Mis-en-place.


RULES OF ENGAGEMENT
(or things to remember when cooking with a salt block) 

  1. The block must be fully heated before using. A block that hasn't been heated enough will actually over-salt and under cook food.
  2. Fast-cooking foods are best. They work well for things like steaks, chicken breasts, thighs, seafood, fish, etc. You wouldn’t want to make a roast or any foods that take a long time to cook on a salt block. Typically, the faster the food cooks, the better it works on a salt block. Vegetables like asparagus, halved tomatoes and sliced courgettes or eggplant also great. 
  3. Don’t ever use oil on the block.  The oil will work itself into cracks in the salt and eventually go rancid. It may even catch fire first while you are grilling/cooking. 
  4.  Keep on cooking.  Once you preheat the block, you can cook on it for several hours. If you wanted to you could cook your whole meal and dessert on the salt block to maximise its use.


TAKING CARE OF YOUR SALT BLOCK

Remember always if you are using a salt block to cook with that patience is your key. Things need to happen slowly. There is no rushing it.  This is an event.  Treat it as such and it will be a much more enjoyable experience.  Also do take care not to ever put it into the dishwasher. Water and salt don't mix very well.  All you will end up with is a very salty dishwasher, and a salt block that has done a disappearing act. 

  • Let it cool naturally and completely after cooking. It must be completely cool before cleaning. 
  • Salt is naturally antibacterial and easy to clean. Do not use soap and use as little water as possible. The more water you use the faster the salt block will wear away since each washing will remove a tiny layer of salt. 
  • Use a scouring pad or sponge to scrub it down and remove any food residue. 
  • Do a final wipe with a clean, slightly wet sponge. 
  • Towel dry with a clean towel and allow to air-dry for 24 hours before you use it again.

There is no reason why if following these rules of care, your salt block should not last and perform very well for you for a very long time!!


I cooked some Steak and Eggs for Todd on ours today.  I started off with the steak.  This was the first time I had actually cooked on it.  The steak didn't get that golden brown sear that I would have gotten in a skillet, but I have to say it tasted amazing.   

I just cooked the egg on the residual heat from the salt block after I had cooked the steak.  That also tasted amazing. I did clumsily break the yolk, but it didn't matter to Todd.  He said it was one of the nicest meals he had enjoyed in a long time.  


I'm not sure what that says about the rest of the meals I have been preparing for him in recent months, but we just won't go there, and take it as a win all the same!

If you are interested in getting a Salt Plate/Block for yourself, do check out Sous Chef.  You won't be sorry that you did. You can check out all of their other goodies while you are at it.  


I wanted to add a photo of the salt block/plate after cleaning.  As you can see above where I am cooking the egg on it, it had quite a bit of residue on it, and of course this was quite baked on, especially egg.  You know how hard egg is to get off things.  It didn't take me very long to clean at all.  I scrape it a bit with a metal spatula to get the worst off and then I used a slightly damp scrubbie pad to scrub the rest off, finally wiping it with a damp cloth and then a dry cloth. It looks almost as good as new and took me less than 10 minutes!!  Todd was surprised when I called him in to look at it. He had thought I was going to have a heck of a time getting it clean again! 👍👍


Read more

Selasa, 05 Maret 2019

Stuffed Brined Pork Chops


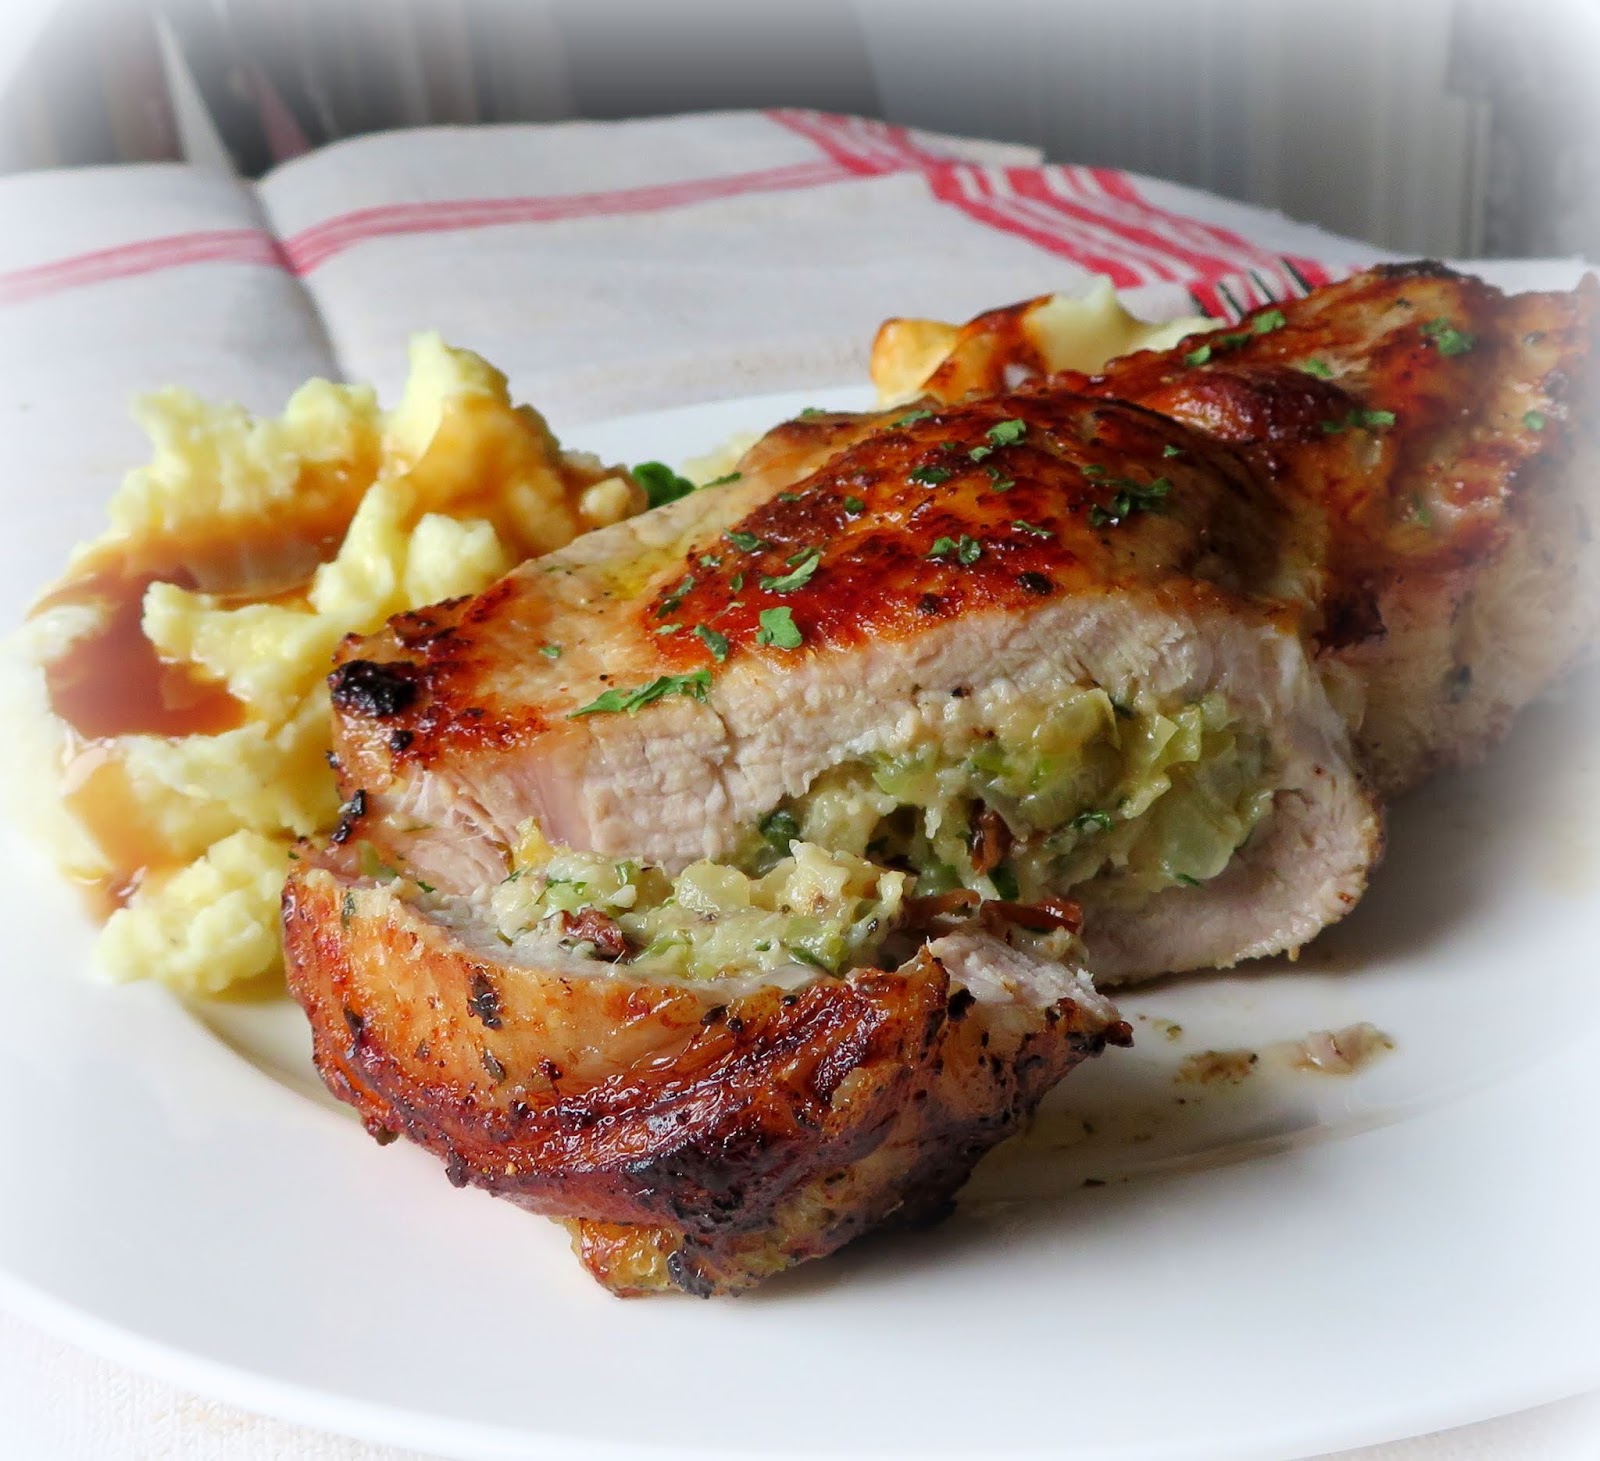
One meat my husband really loves is Pork Chops.  He loves nothing better.  Cooking pork chops can be a bit tricky I find.  There is an optimum length of time to cook them and it varies from chop to chop, depending on the type and the thickness of the chop. 


In the old days people were really afraid of under-cooked pork and so had a tendency to way overcook their pork.  My poor mum used to feed us chops that were so overcooked, you needed a ton of gravy or applesauce just to make them edible.  Bless her  . . . she meant well and had only our safety in mind. Everyone had the same fears with pork and overcooked their meat. It wasn't just her.


One thing which helps with the tenderness  of chops is to brine them prior to cooking.  This is a technique that I have only discovered in recent years and I have to say that it really makes a huge difference!  My chops were never dry anyways, but now they are even better! 


Its amazing what the magic solution of cold water, salt and sugar and an hour of time can do! 


For this recipe today you will want bone in rib loin chops that are at least 1 1/2 inches thick.  The reason you want them this thick is that you will be stuffing them . . .


I don't think you can get much tastier than a stuffed pork chop! 


The stuffing for these is a really simple one . . .  using simple ingredients.  Butter softened onion and celery, with a mix of herbs  . . .  thyme, parsley, sage and a bit of garlic . . .  some salt and pepper  . . .


Mixed with some white bread crumbs and some cream to moisten everything and get it to stick together.  I also add some chopped raisins for a hint of sweetness, but you can leave them out if you wish, or replace them with chopped apple, or dried apricots, or even dried cranberries.  All work well. 


You will want to cut a deep pocket in the brined chops.  I make only a tiny incision on the fatty edge, and then move the knife around inside to carve a pocket . . .  carefully.  You want a sharp knife and you don't want too large of an opening.  Too large and you run the risk of your stuffing bursting out during cooking.


You want all that tastiness to stay inside, which is why you want only a tiny opening on the edge.  I recommend no larger than you index finger.  It is quite doable, trust me on this.


Once you have the pocket cut you can stuff the chops.  I pop it in through the opening and then massage it around from the outside of the chop so that it fills the whole pocket.  Do take care not to let the stuffing get too close to the opening and press it well shut when you are done.  You could of course close with toothpicks, but its really not necessary and it actually makes them harder to brown if you do.


Once they are stuffed you simply brown them on both sides, pop them into a baking dish and then finish them off in a hot oven.  Easy peasy.

Yield: 4

Stuffed Brined Pork Chops

prep time: 1 hourcook time: 40 minstotal time: 1 hours and 40 mins
You will need thick, bone in pork chops for these (at least 1 1/2 inches thick).  They are brined first for an hour prior to stuffing, browning and baking. Let assure you that all the fuss is worth it.  Succulent, tender and delicious! Note you will need to brine the chops for one hour prior to starting.

ingredients:

  • 1/5 litres of cold water (1 1/2 quarts)
  • 3 TBS kosher or sea salt
  • 3 TBS granulated sugar
  • 4 bone-in  rib loin chops, 1 1/2 inches thick
  • (12 ounces each)
  • 3 TBS butter
  • 1 medium onion, peeled and minced
  • 1 stalk celery, trimmed and minced
  • 1/2 tsp salt
  • 1/2 TBS dried parsley
  • 1/2 tsp each dried thyme and sage
  • 1 clove garlic, peeled and minced
  • 2 sliced sandwich bread, crusts trimmed and cut
  • into small cubes
  • 4 TBS raisins, chopped (optional)
  • 2 TBS heavy cream
  • 1/8 tsp black pepper
  • 1 TBS vegetable oil

instructions:

  1. Whisk together the cold water with the salt and sugar until both the salt and sugar dissolve.  Place the chops into the mixture, making sure they are completely submerged.  Leave for 1 hour.  At the end of that time, remove them from the water and pat dry.
  2. To make the stuffing, melt the butter in a skillet over medium heat.  Add the celery and onion.  Cook, stirring occasionally, until the vegetables have softened.  Add the garlic and herbs.  Cook for a further half a minute or so until fragrant.  Transfer to a bowl and toss together with the bread cubes and chopped raisins.  Season with some salt and black pepper. Add the cream and mash well together until you have a fairly solid mass that you can handle easily without it crumbling too much.
  3. Take each chop and cut a pocket into each.  Use a very sharp knife and just using the tip, puncture the chop on the fat edge, making a small opening, and then by carefully manoeuvring the tip of the knife, cut a pocket inside the chop without enlarging the cut on the edge, or poking through the surface of the chop. (This will help to make sure that the stuffing stays inside when the chops are cooking.)
  4. Preheat the oven to 230*C/450*F. gas mark 7.  Have ready a shallow baking dish large enough to hold all four chops.
  5. Stuff each chop with 1/4 of the stuffing, massaging the chop on the outsides to work it through to fill the pocket entirely. (I try to keep it at least 1/3 of an inch away from the pocket incision.)  Season your chops on both sides.
  6. Heat the vegetable oil in the skillet and brown the chops on both sides, about 3 minutes or so per side.  Transfer the browned chops to the baking dish.
  7. Bake the chops in the preheated oven for about 20 minutes, or until the juices run clear.  Remove from the oven and tent for about 5 to 10 minutes with some aluminium foil. 
  8. Serve hot with your favourite sides.
Created using The Recipes Generator


These really are very good.  Tender and delicious . . . succulent.  I guarantee your family will love them.  I served them with mashed potatoes, some gravy, a bit of cauliflower cheese that I had leftover from another day and some frozen peas.  Todd was in pork chop heaven!  Bon Appetit! 


Read more

Rabu, 10 Oktober 2018

Brined & Breaded Baked Pork Chops


We don't eat red meat very often in our home. It is a rare treat for us, so when we do, I want to make sure that I prepare it in as best a way as I can.  We were having company for lunch the other day and I decided to cook some pork chops that I had bought at Costco. 


They were lovely, thick bone-in loin chops.  I had not seen chops that thick in a long time.  I think they were about 1 1/2 inches thick.  I was a bit concerned as to how I was going to cook them adequately without drying them out. 


I decided that I would try brining them.  Brining is simply a food process where meats and poultry are soaked in a salt/sugar brine for a time prior to cooking them, which not only lightly seasons them but helps to tenderise and enhance the flavour of the meat. People have been brining chickens and turkeys for years.


I created a simple brine of water, apple juice, salt and herbs.  I soaked the pork chops in this mixture, covered in the refrigerator overnight, for about 18 hours actually by the time I went to cook them.  12 hours minimum is desirable.


At the end of that time, I took them out of the brine, rinsed them off and patted them dry, discarding the brine.


I always slash the fatty edge of my chops prior to cooking them, right through the fat to the meat. This helps to prevent them from curling up as they are cooking, and makes for a much more attractive presentation.


I seasoned them all over with some garlic powder (NOT salt), a tiny bit of salt, some freshly ground black pepper,  and dried sage.  Sage and pork go very well together.


I lined a baking tray (with sides) with some heavy foil and then popped the chops onto the tray. I sprinkled each chop with some fine dry bread crumbs and dotted them with butter, then popped them into a hot oven.


I cooked them for about 15 minutes, then took them out of the oven and poured a bit of fruit juice around them in the pan. I used apple juice because that is what I had, but any fruit juice would work. I have used cranberry in the past, as well as orange and pineapple.  All work very well.


Back into the oven they went for a further half an hour.  I checked them periodically to make sure the fruit juice wasn't cooking dry.  The juice helps to keep them moist as well as adding additional flavour and helps to increase their tenderness even more. 


This is a trick I learnt from one of my mother's old meat cookery books that she bought back in the 1950's when she first got married. It works, and is delicious.


The end result was perfectly cooked chops, that were indeed very tender, moist and delicious!  They went down a real treat! I had actually cooked 6 at the time, and what you are seeing here is the two leftover ones gently reheated the day after.  Still succulent, tender and delicious.

Yield: 4

Brined & Breaded Baked Pork Chops

prep time: 12 hourcook time: 45 minstotal time: 12 hours and 45 mins
I recently bought some really thick chops at Costco and wanted to cook them in such a way as I did not dry them out.  I decided to brine them first. It worked like a charm. We had delicious tender and flavourful chops!   Plan ahead as the chops need to brine overnight.

ingredients:

For the Brine:
3 TBS non-iodised salt
2 cups water
2 cups apple juice
1 TBS mixed herbs

For the chops:
4 bone in thick pork chops
salt, pepper, dried sage and garlic powder
2 TBS fine dry bread crumbs per chop
butter to dot
apple juice (other fruit juices also work well,  like pineapple, cranberry or orange)

instructions:


Heat the water and salt until the salt dissolves. 
Stir in the apple juice and mixed herbs. (I used a mix of sage, parsley,
 and summer savoury)  Once the mixture is room temperature, put it into a
 plastic container large enough to hold the chops in a single layer,
with a lid.  Put in the chops, cover and refrigerate overnight or for at
 least 12 hours.

When you are ready to
cook the chops take them out of the brine, rinse them off and pat dry.
Slash the fatty edge at 1/2 inch intervals.  This helps to keep them
from curling up when they are cooking. Season each all over with salt,
pepper, dried sage and garlic powder.

Preheat
the oven to 200*C/400*F/ gas mark 6.  Line a baking tray with sides with
 heavy duty aluminium foil. (Do NOT skip this. It saves on cleanup after.)
 Place the seasoned chops on the baking sheet in a single layer.  Top
each with 2 TBS fine dry bread crumbs. Dot with butter.  Bake for about
15 minutes.  Remove from the oven. Pour a quantity of fruit juice around
 the chops and return to the oven. (about 1/4 inch in depth) Bake for a
further 25 to 30 minutes, until golden brown and the juices run clear. 
Check periodically to see that the apple juice doesn't run dry, topping
it up as needed.  Serve hot with your favourite side dishes and
vegetables.
Note - Cook time depends on the thickness of your chops. Mine were about 1 1/2 inch thick.  A thinner chop would not need as much time to cook, so judge according.  Bone in chops work best.
Created using The Recipes Generator


Brined Pork Chops
I served these with a variety of vegetables . . .  frozen peas  mixed with corn, cauliflower cheese, and a carrot and swede mash.  Of course we had applesauce with them.  Pork Chops and applesauce are a marriage made in heaven!  Bon Appetit!


Read more